SETTING UP AUTHORIZE.NET - MKB0133 Follow
Please Note: Over the upcoming months, will be phasing out Authorize.net in favor of Print Reach Pay Payment Method. Select here if you are not already using Print Reach Pay and would like to learn more about it. This link will take you to the Knowledge Base article on the various features of Print Reach Pay, and how to set it up in MyOrderDesk.
In this article we will demonstrate how to set up the Authorize.net Payment Method. Authorize.net allows users to pay with credit and debit cards during the checkout process.
Start Here:
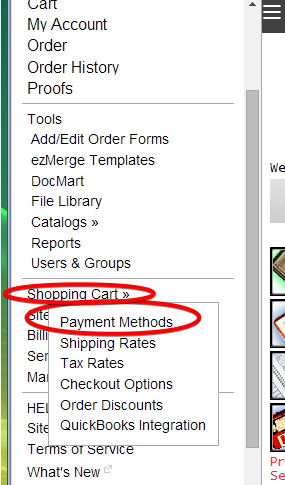
Use the Administration Menu to navigate to Shopping Cart > Payment Methods
Setting Up Authorize.net.
Step 1. Using the Add Payment Method drop down menu, select "Authorize.net".
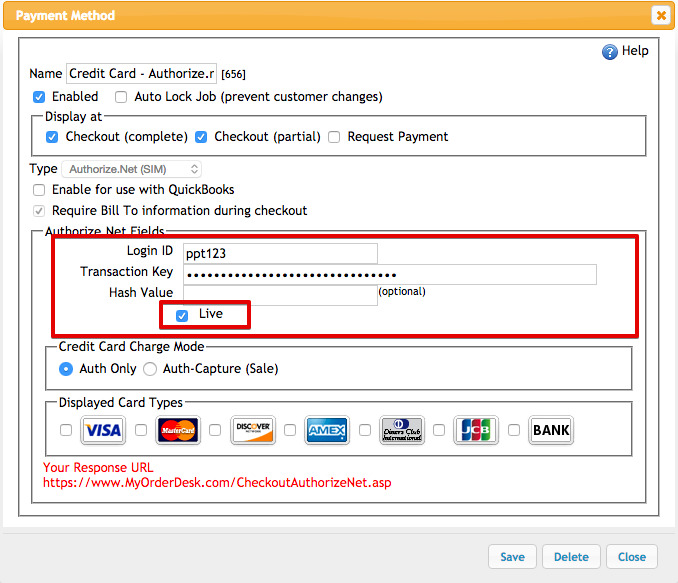
Step 2. We recommend naming the payment method "Credit or "Credit Card" then check the Enabled box.
- Check Auto Lock Job to prevent users from making changes to the order after the payment is submitted. ( Recommended )
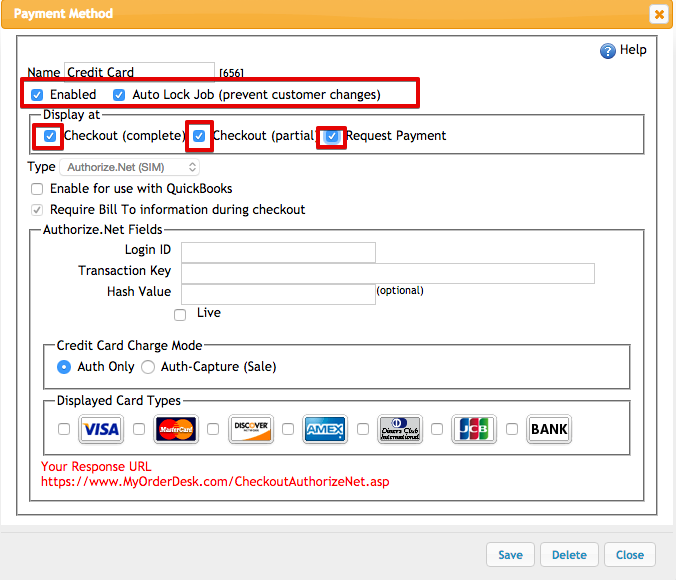
- You can choose when this Payment Method displays during checkout.
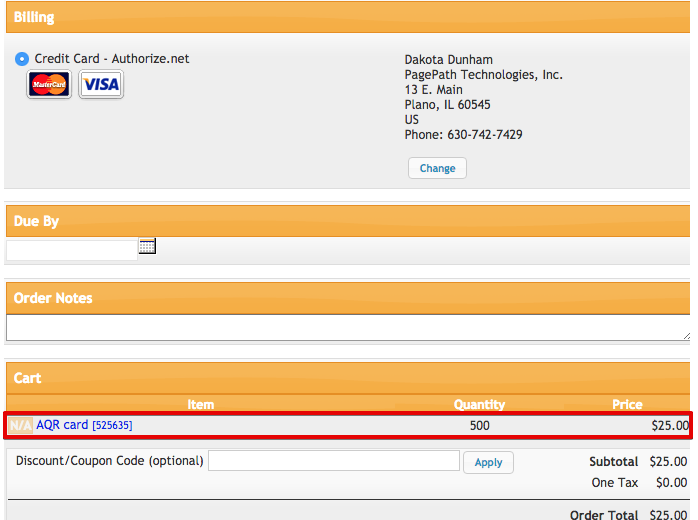
- Checkout (complete) - Payment method is displayed to the user at checkout when all items have pricing.
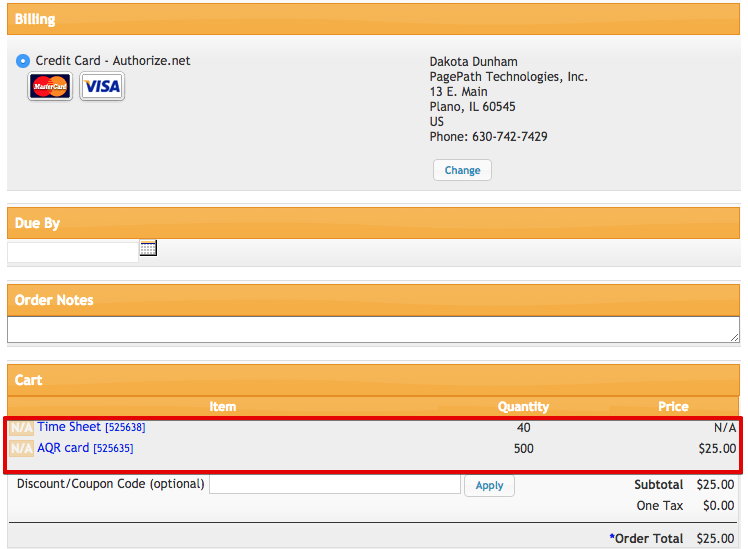
- Checkout (partial) - Payment method is displayed to the user at checkout when some items have no pricing.
- Request Payment - Payment method is displayed to the user when using the Request Payment feature after the cart has been checked out.
Step 3. Enter your Authorize.net Account Information.
- The hash value, if any, you defined in your Authorize.Net account under Settings -> General Security Settings -> MD5-Hash. The hash result is shown as the Authenticated result in your charge ledger.
- If you would like to test your Payment Method without charging the card leave the "Live" checkbox unchecked.
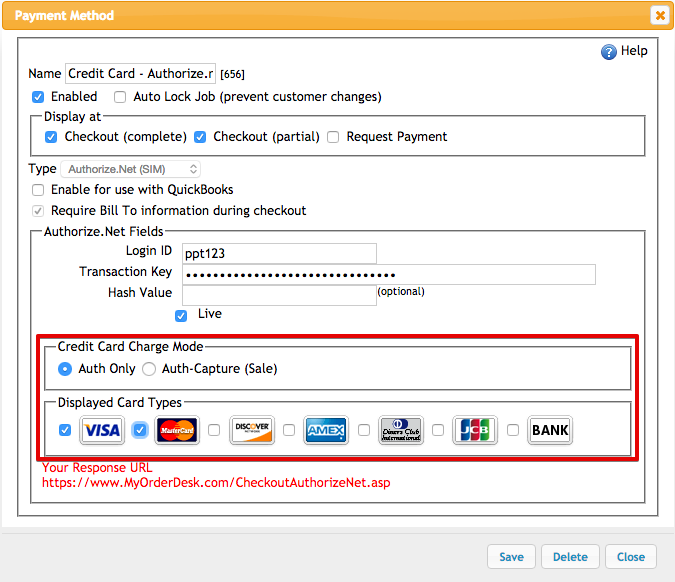
Step 4. Choose how you would like to process the payment.
- Auth Only - An authorization payment action represents an agreement to pay and places the buyer's funds on hold.
- Auth-Capture - An authorization with immediate capture (sale) payment action represents a single payment that completes a purchase for a specified amount.
- Check the boxes next to the card icons that you would like displayed below your Payment Method.
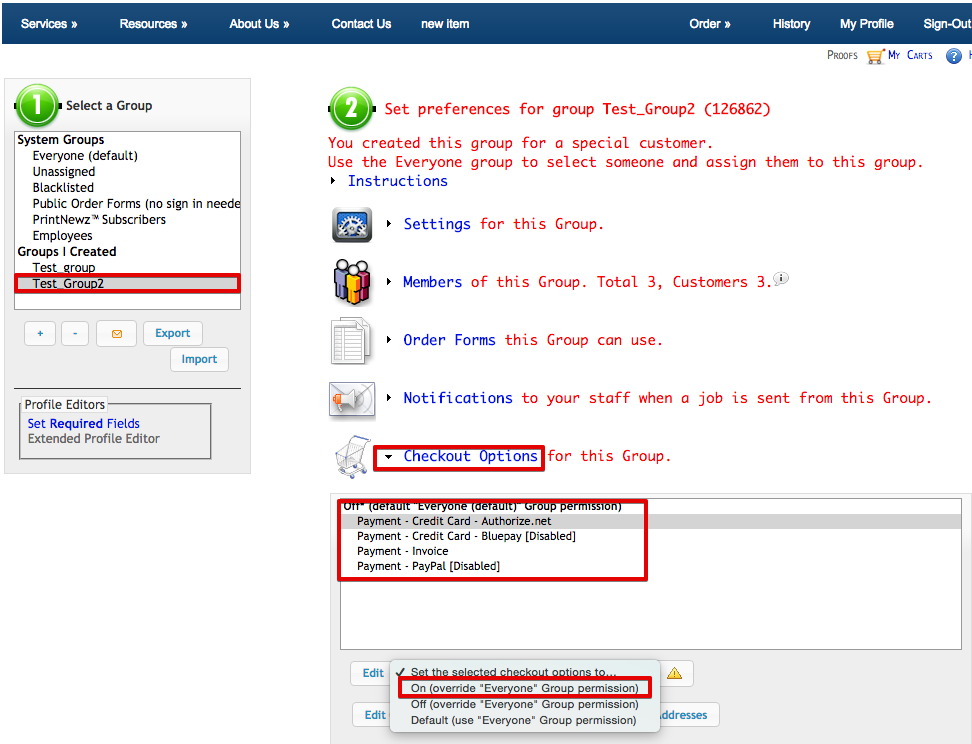
Step 5. Navigate to the Users&Groups page to enable the Payment Method for your group(s).
Step 5-1. Click on a group that will be using this Payment Method.
Step 5-2. Expand Checkout Options.
Step 5-3. Select the Payment Method(s) and use the drop down menu to turn them on.
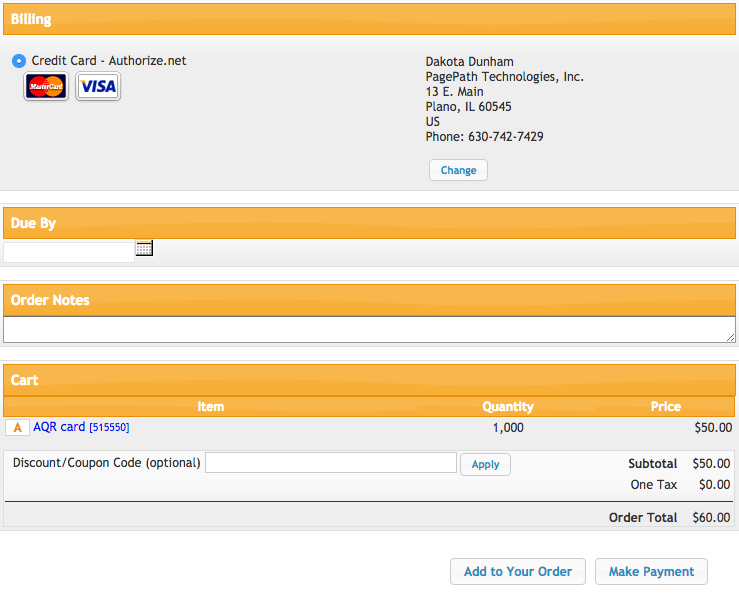
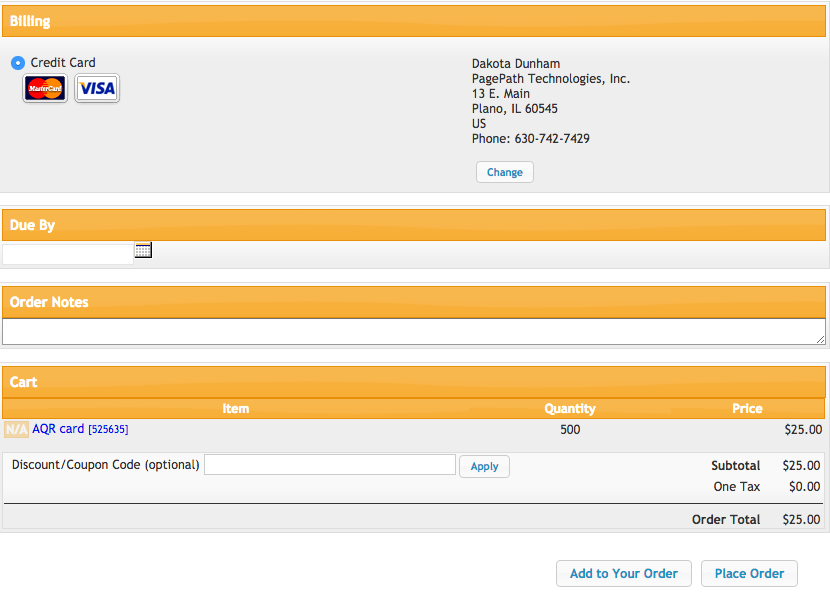
The Authorize.net Payment method is now ready! The image below is an example of how it displays!
If you have questions or would like extra support on this topic please call 866.770.7561 opt 2. or open a support ticket.