Custom Reports for both your customers and your shop Follow
MyOrderDesk's Reporting feature allows you to create reports for your customers and your shop.
Below are a few highlights of Reporting:
- No coding involved.
- Build custom reports for your staff, individual users, a group of users or everyone.
- Customers can run their reports at their convenience from their storefront.
- Reports can be viewed in the browser, exported to a CSV file, or printed.
Overview of the Reports Table
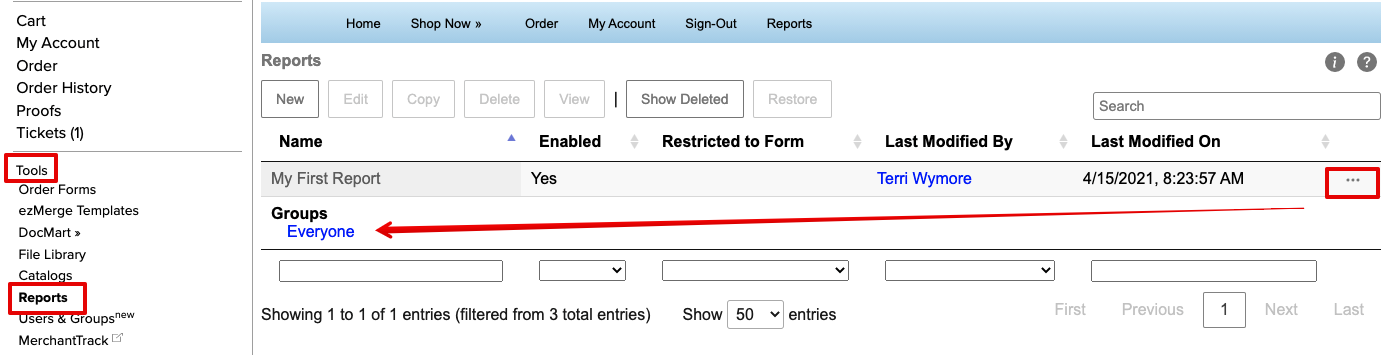
Reports are built under the Admin Menu > Tools > Reports. They are run from the Order History > Reporting dropdown menu.
As seen in the image below, each one of your reports will be listed on a separate row in the table. By selecting in the row of a particular report, you can do various actions as seen in the row of buttons above the table (New, Edit, Copy, Delete, View, Show Deleted, Restore (deleted)).
By using the "..." icon at the end of the table, you can easily see any of the groups that have access to this report. If you click on the name of the Group, you can go directly to that group and manage the groups that have access to that particular report.
Building a Custom Report
From the Report Table, select New.
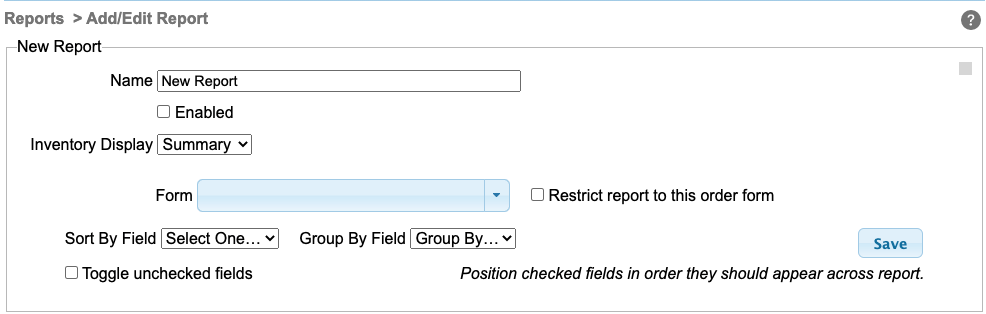
Complete the Fields to create your report.
Name - Type a report name – this name will be displayed to your customer. We recommend adding the customer’s name for easy management purposes.
Enabled - Turn the Report on and off using the Enable checkbox
Inventory Display - Select if you want inventory details to be shown in a Summary or detailed (Expanded) format.
Form - Choose one of your Order Forms to base your report on from the dropdown menu. After selecting an Order Form, a list of all the fields on that Order Form will appear.
Restrict report to just this order form - Selecting this option will make it so this report only contains data from the report you chose. If you want this report to show data from orders on all forms, then leave it unchecked.
Sort by Field - You can have the report sort by any particular field that has been chosen to display on the report.
Group by Field - You can group together data from any particular field that has been chosen to display on the report.
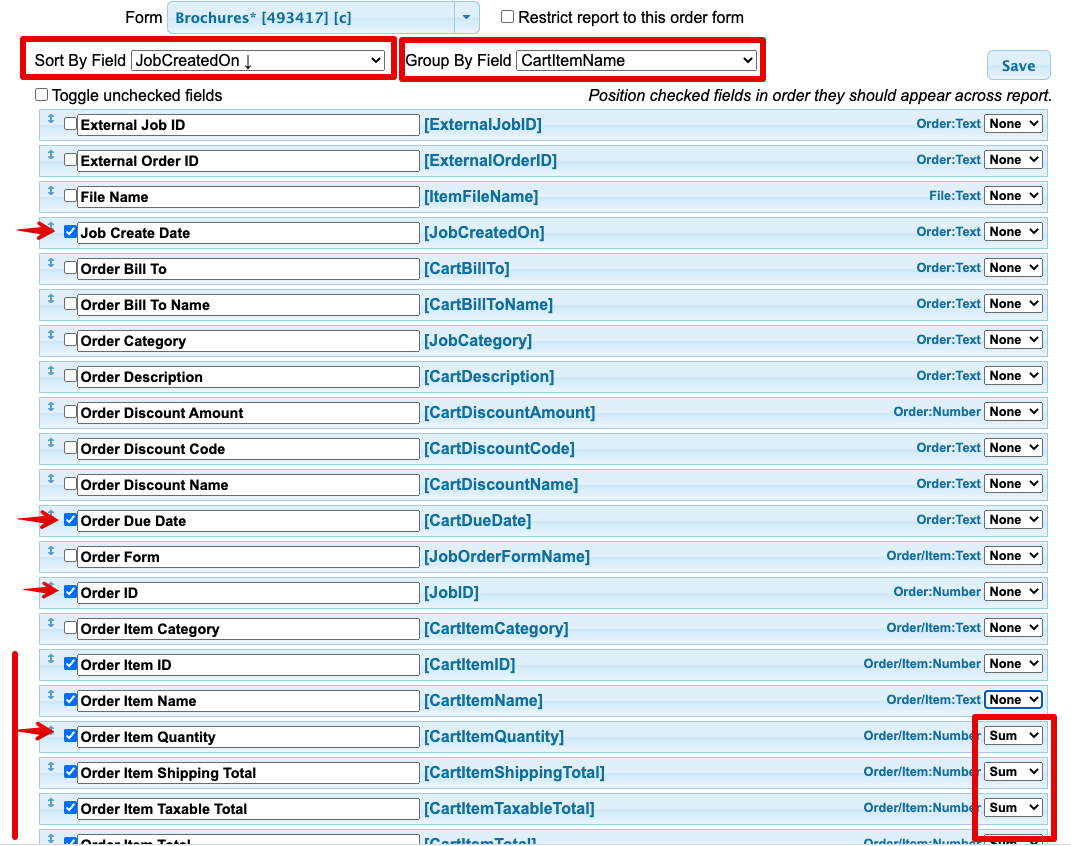
Choose the columns that you'd like to display on the report. When complete, click Save.
The pull-down menus to the right allow you to specify whether or not you'd like to calculate a Count or Sum at the bottom of the report.
Count - How many times the item occurs in the report.
Sum - Addition of all the numbers in a single column.
Both - Both the count and the sum at the end of the report.
Note: The fields shown will display in the order that they are shown in the list. If you would like to re-arrange the columns of information, simply select a row and move it up or down.
Making the Report Available to Your Groups
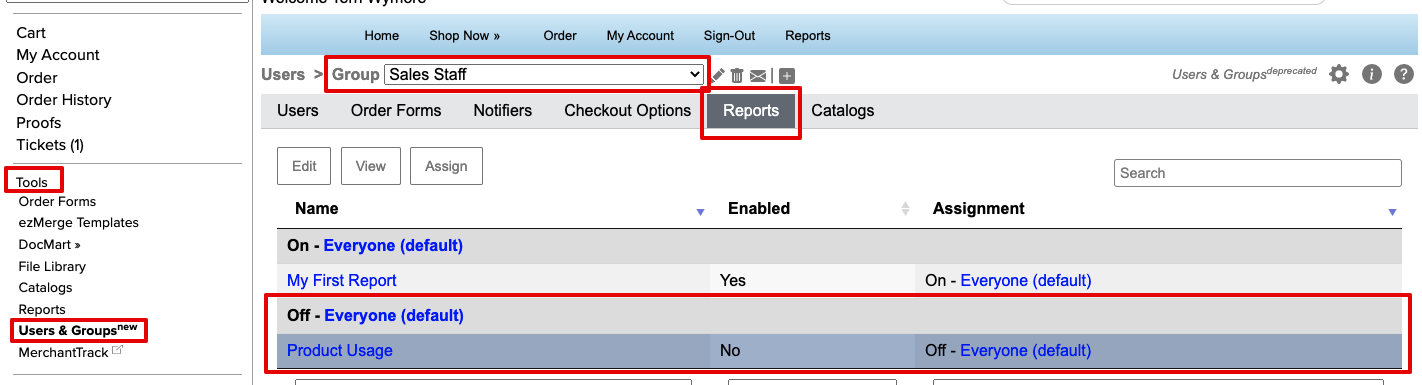
In order for someone to run your report, you must make it available to a Group they are a member of. Go to Admin > Tools > Users & Groups.
- Select from the Group dropdown, the name of the Group you want to turn the report On for.
- Select the Reports button in the navigation area.
- Select inside the row that lists the report you want to assign to a Group.
- With the row selected, choose the Assign button.
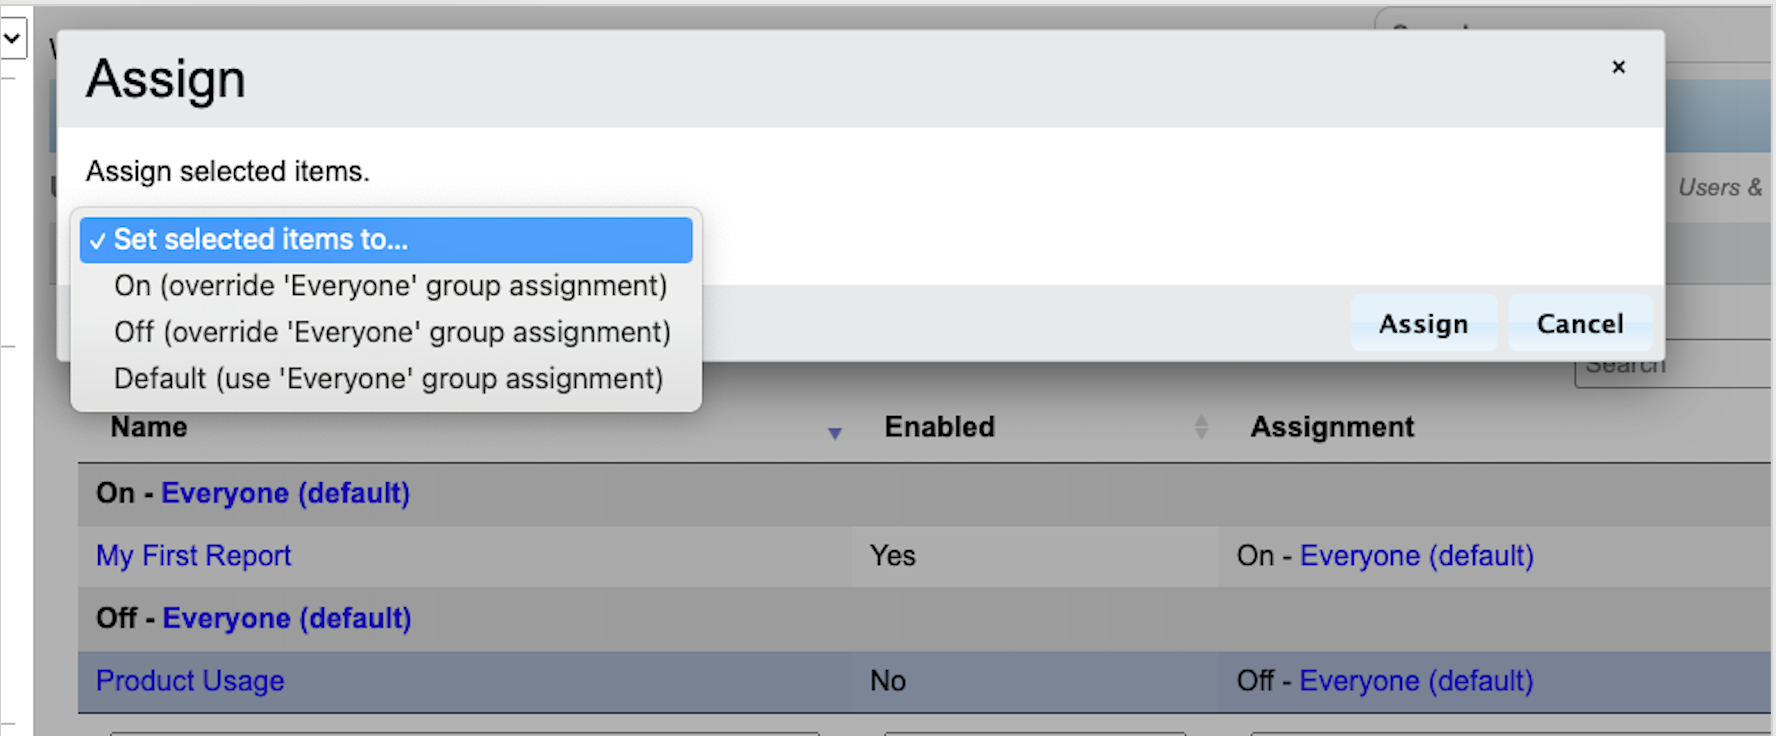
- In the popup window, turn On the Report for that Group.
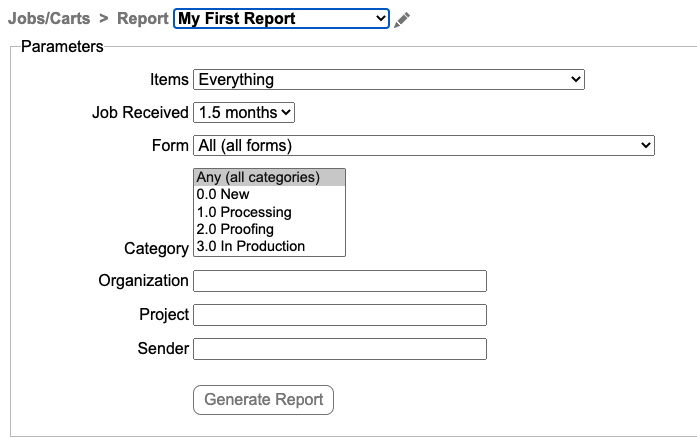
Running the Report
Reports are accessed by going to the Order History page and selecting Reporting from the top right, and then selecting the report you want to run from the dropdown presented.
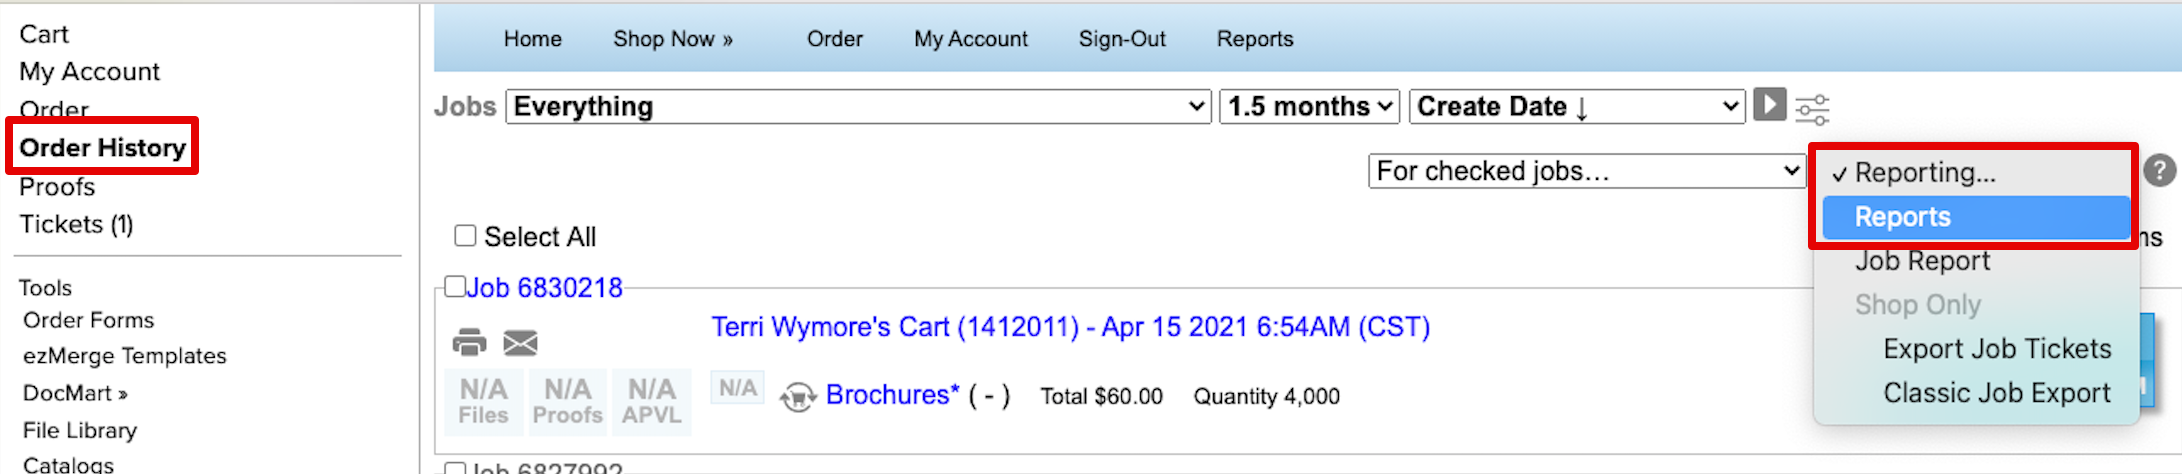
The report name will appear in the dropdown list. Set any additional parameters and click Generate Report.