Setting up the PayPal Integration Follow
This article cover setting up the Printer's Plan Paypal integration and the features the integration provides.
Step 1: Generate PayPal API Credentials
To enable the Printer’s Plan integration with Paypal you will need to generate API Credentials for your
Paypal account. The following link outlines how to create these credentials: https://www.paypal.com/us/smarthelp/article/How-do-I-create-REST-API-credentials-ts1949
Step 2: Configure Printer’s Plan
After you generate the credentials, in Printer’s Plan go to the Settings tab, open the Third Party
Integrations folder and select Paypal.
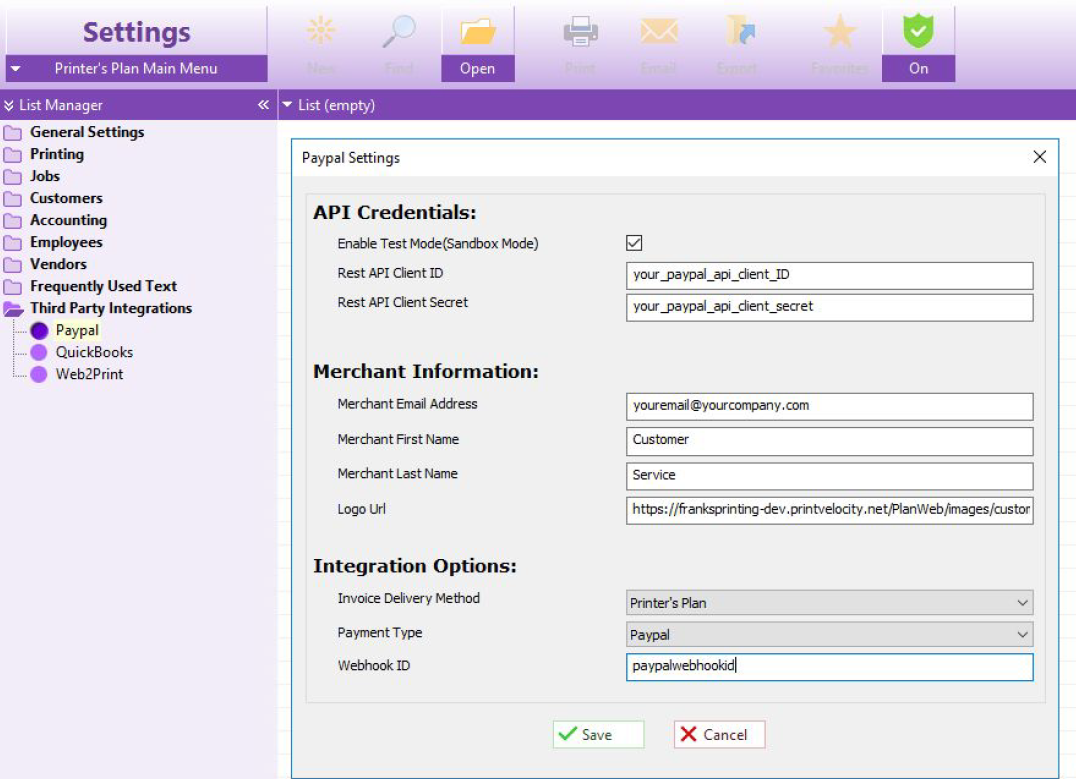
In the PayPal Settings window you will need to fill in the following fields:
Enable Test Mode (Sandbox Mode)
You can run the PayPal integration in a test mode, to do this, check-in the Enable Test Mode
option. This will prevent live invoices from being created on the PayPal site. Additionally, if you
are using the PayPal Delivery method, emails will not be sent to the customer.
Uncheck this option to run the integration in Live mode.
Rest API Client ID (Required)
In this field enter the Rest API Client ID created in Step 1 of this document.
Rest API Client Secret (Required)
In this field enter the Rest API Client Secret created in Step 1 of this document.
Merchant Email Address (Required)
Enter the email address that is linked to your PayPal account.
Merchant First Name, Last Name (Required)
Enter the name that you would like to appear at the top of the PayPal invoice.
Logo URL (Optional)
Enter the URL address of your company logo image file, this logo must use an HTTPS address.
Invoice Delivery Method (Required)
To send email notification via Printer’s Plan set the Invoice Delivery Method field to Printer’s Plan:

Webhook ID and Payment Type
If you are running the Printer’s Plan API (Web2Plan), or PlanWeb solution, payments entered online can automatically be recorded in Printer’s Plan. For this to work your Web2Plan/PlanWeb solution will need to have an SSL Certificate and you will need to create a Webhook ID.
If you are not running these solutions, invoices paid online will have to be manually entered into
Printer’s Plan.
To enable the payment integration you will need to create a Webhook ID, this is done on the PayPal
Developer site for your PayPal business account: https://developer.paypal.com
When you log in to the developer account go to the PayPal DashBoard and select My Apps &
Credentials. In this window, under the REST API apps section, you should see the app created in Step 1
of this document.
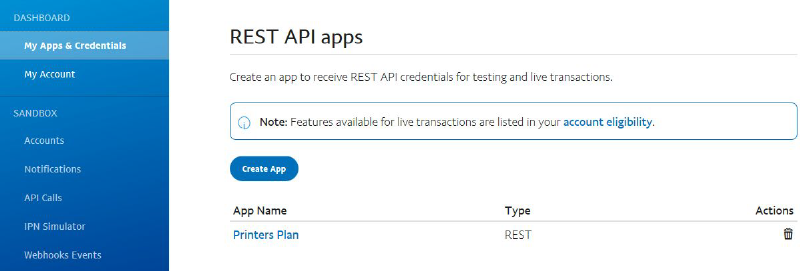
Click on the App, and on the next page click the Add Webhook button. In the Webhook Url field enter
the address of the PayPalListener. It should look similar to the following with your domain replacing the
“mywebsite.com” portion:

After entering the Url, under the Event types section, check in the Invoicing invoice paid option:

Click the Save button to save these changes and a Webhook ID will be generated:

Enter this Webhook ID in the Printer’s Plan PayPal Settings window.

All payments sent from PayPal to Printer’s Plan will be classified with the same payment type. In the
Printer’s Plan PayPal Settings window, in the Payment Type field select the default Payment Type:

Please note, you can create payment types in the Settings | Accounting | Payment Types window.
Step 3: Creating a PayPal Invoice and Notifying the Customer.
In Printer’s Plan, when a job is complete, open the order and click the Print button. In the Print window
select the option E-Invoice (PayPal).
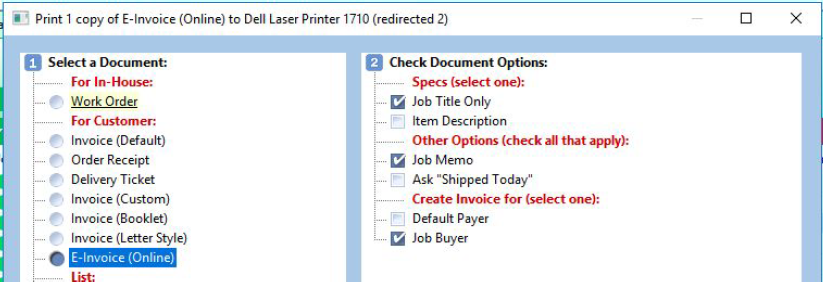
On the right side of the Print window you can select the document options. The selections in this
window will determine which data is populated on the Paypal version of the invoice. You can set
defaults for these options in in the Settings | Printing | Document options window.
It is important to note that these options are only used when you initially send the invoice to PayPal.
Any changes made to the job in Printer’s Plan will not be automatically updated on PayPal. Instead you would have to manually edit the invoice on your PayPal site.
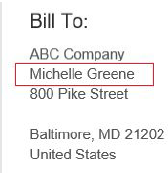
For the ‘Create Invoice for (select one)’ document option, this selection determines the name that will
be inserted in the Bill To portion of the PayPal invoice. Once the job has been sent to Paypal this
selection cannot be changed.
Once the options are set click the Send button to generate the Invoice online.
After clicking the Send button, if you are using the PayPal Delivery Method, the Create Invoice for
(select one) selection will determine the email address that will be sent an email notification. This
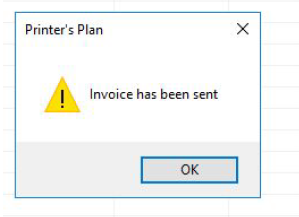
email will be automatically sent from PayPal and Printer's Plan will display a successful Invoice has been
sent alert message.
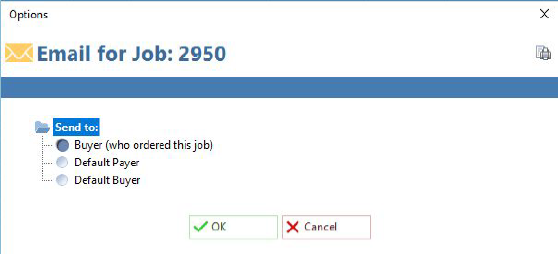
If you are using the Printer’s Plan Delivery Method, after clicking the Send button an Options window
will appear allowing you to select the contact that will receive the email notification:
Next, a window will open allowing you to select a template that will populate the body of the email
message.
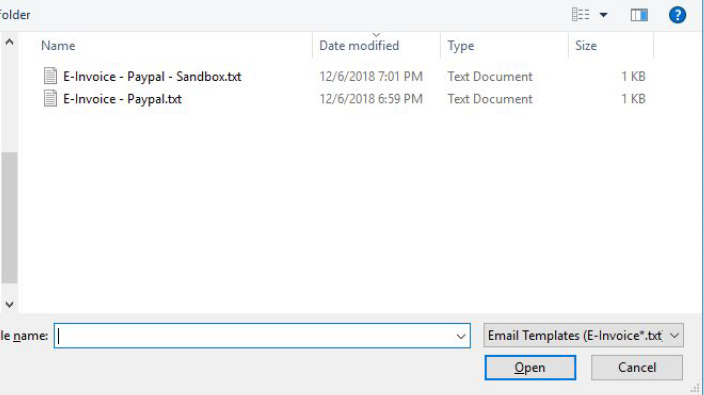
These template files are stored in the Email folder where your database is located. You can customize
and create additional template files in this folder. After selecting a template an email message will
appear:
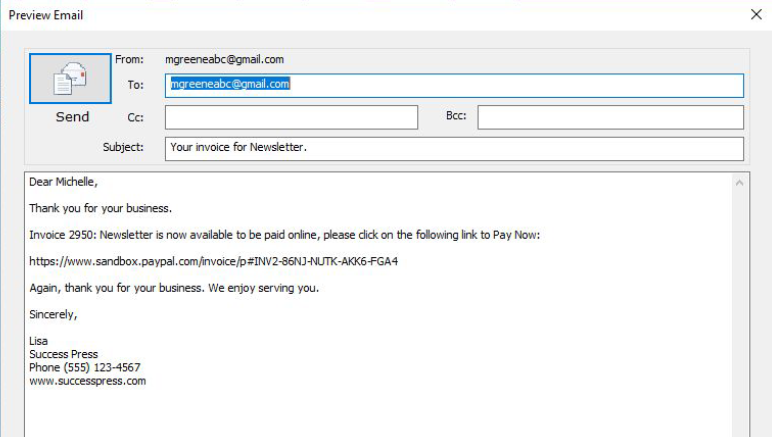
When you click the Send button the email will be sent to the customer: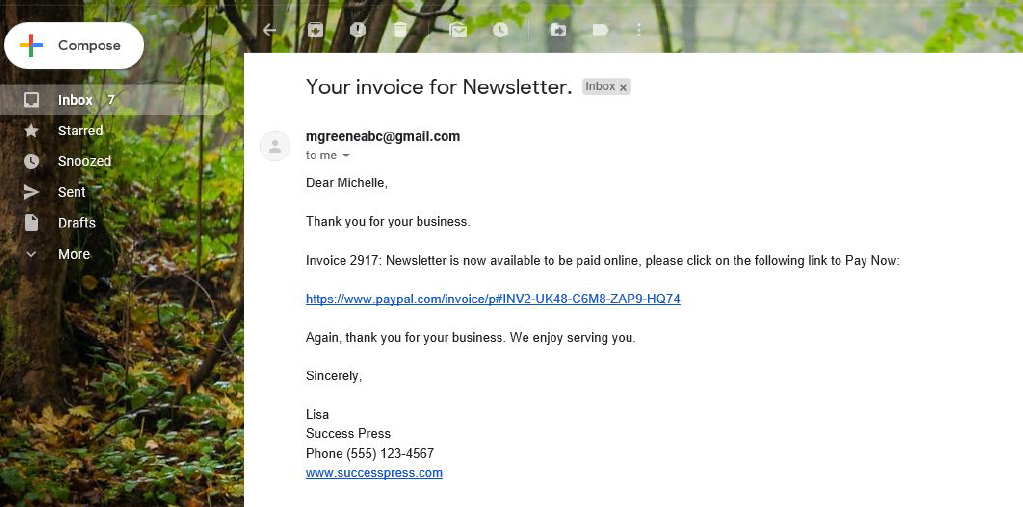
When the customer clicks on the Pay Now link on the email they will be taken to the PayPal site where
they can pay for the invoice using any major credit card or their PayPal account.
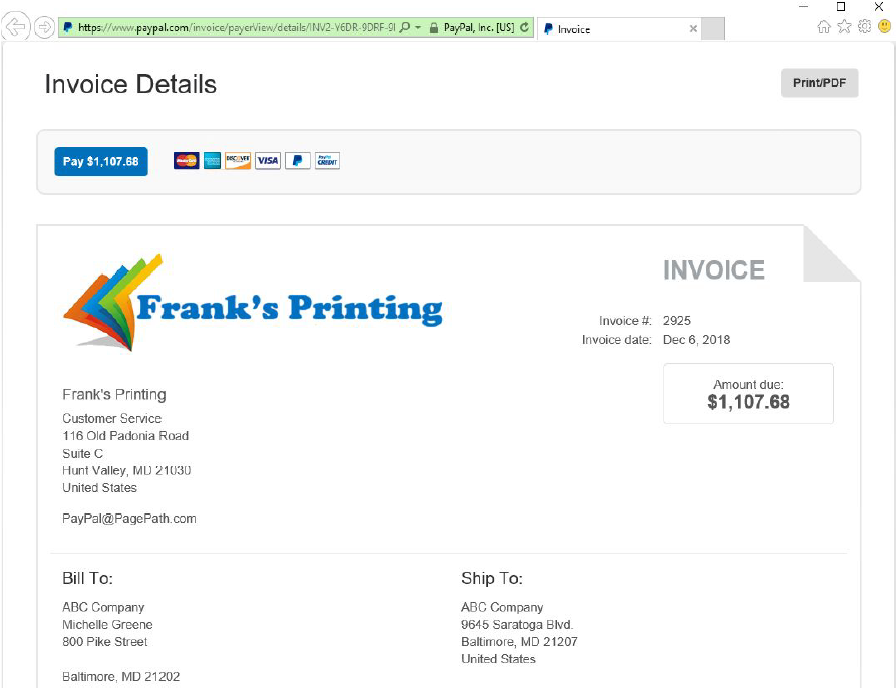
When the client pays the invoice you will be sent an email notification, and if you are running the
Printer’s Plan API (Web2Plan) or customer-facing website (PlanWeb) solution, the payment will
automatically be recorded in Printer’s Plan.
