Print Reach Pay - Printer's Plan Quick Start Guide Follow
This article is a quick start guide for Print Reach Pay integrated payments in Printer's Plan.
The Full documentation can be located here: https://printreach.com/
Table of Contents:
- Build a Payment Type
- Set Configuration Settings
- Applying a Payment to a Job
- Applying Payment to Multiple Invoices
- How to reverse a transaction
- Sending Pay Now buttons
- Update Printer's Plan API
- Reports, Summaries (Merchant Track)
1. Build a Payment Type
Under Settings > Accounting > Payment Types, build a new payment type called Print Reach Pay
2. Set Configuration Settings
Settings > Print Reach Pay > Payment Processing >
Enabled: Make sure this box is checked, if not, check it, then close and re-open Printer's Plan.
Merchant ID: Confirm there is a value present (If none is present, please stop and troubleshoot with support)
Payment Type: Set to Print Reach Pay
Hosted Payment Page URL: This link is supplied by Print Reach and will be in your welcome email
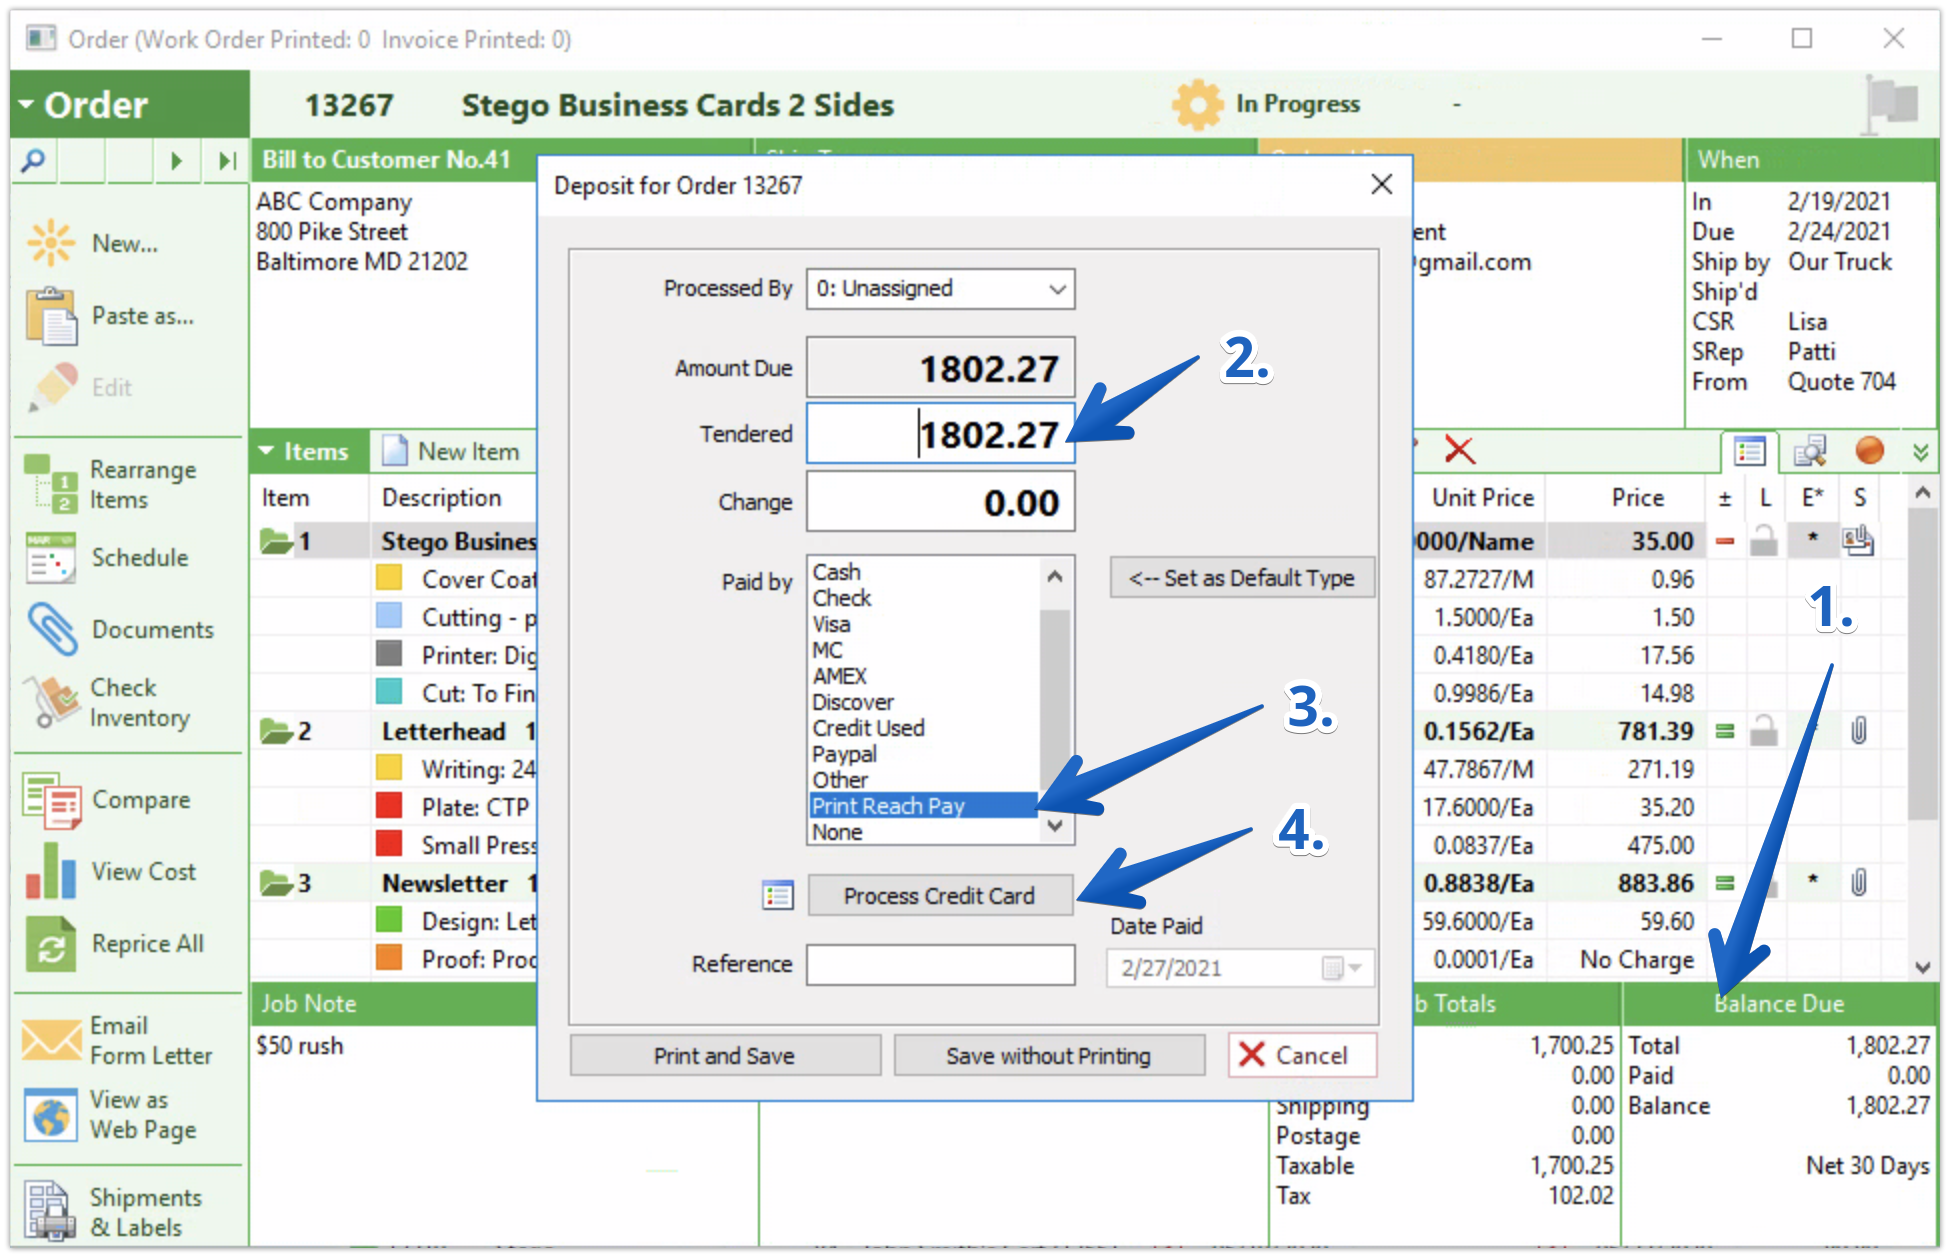
3. Applying a Payment to a Job
Open a Job you'd like to apply a payment to and click Balance Due
Tendered Amount: Set the amount you'd like to charge the customer
Paid by: Select Print Reach Pay
Click the Proces Credit Card button
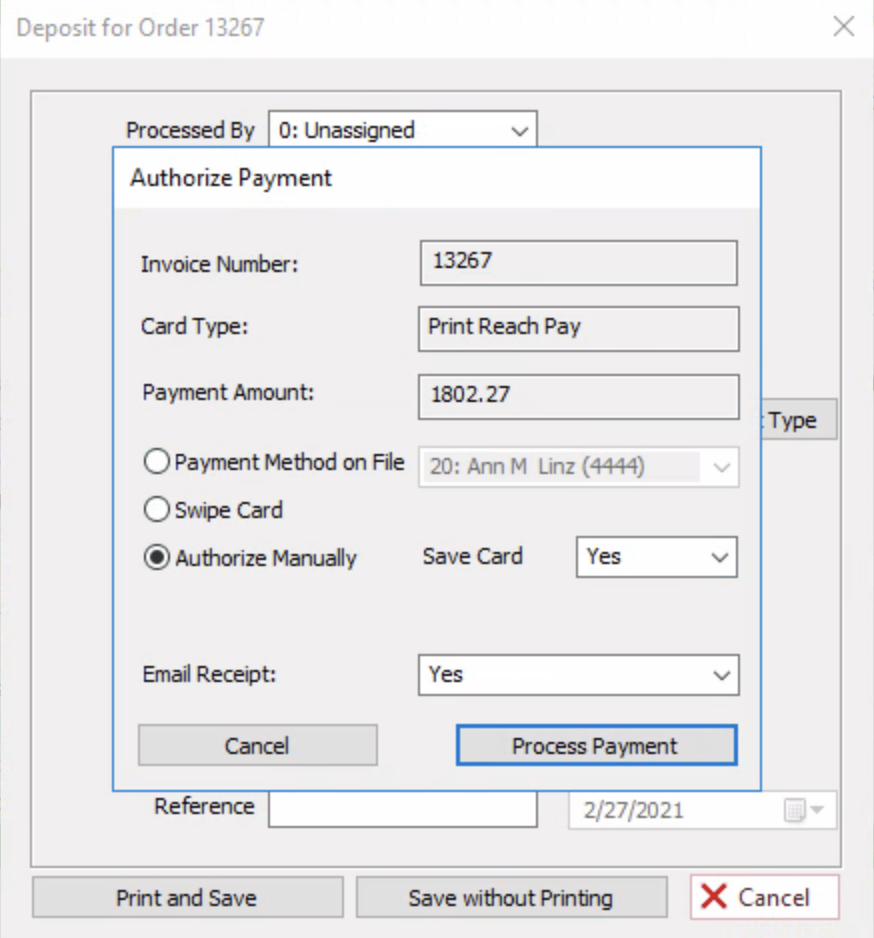
Select which method you'd like to charge the customer:
Payment Method on File: All credit cards stored for this company will show in the drop-down menu
Swipe Card: If you have a USB swipe device plugged into the customer and would like to swipe the card.
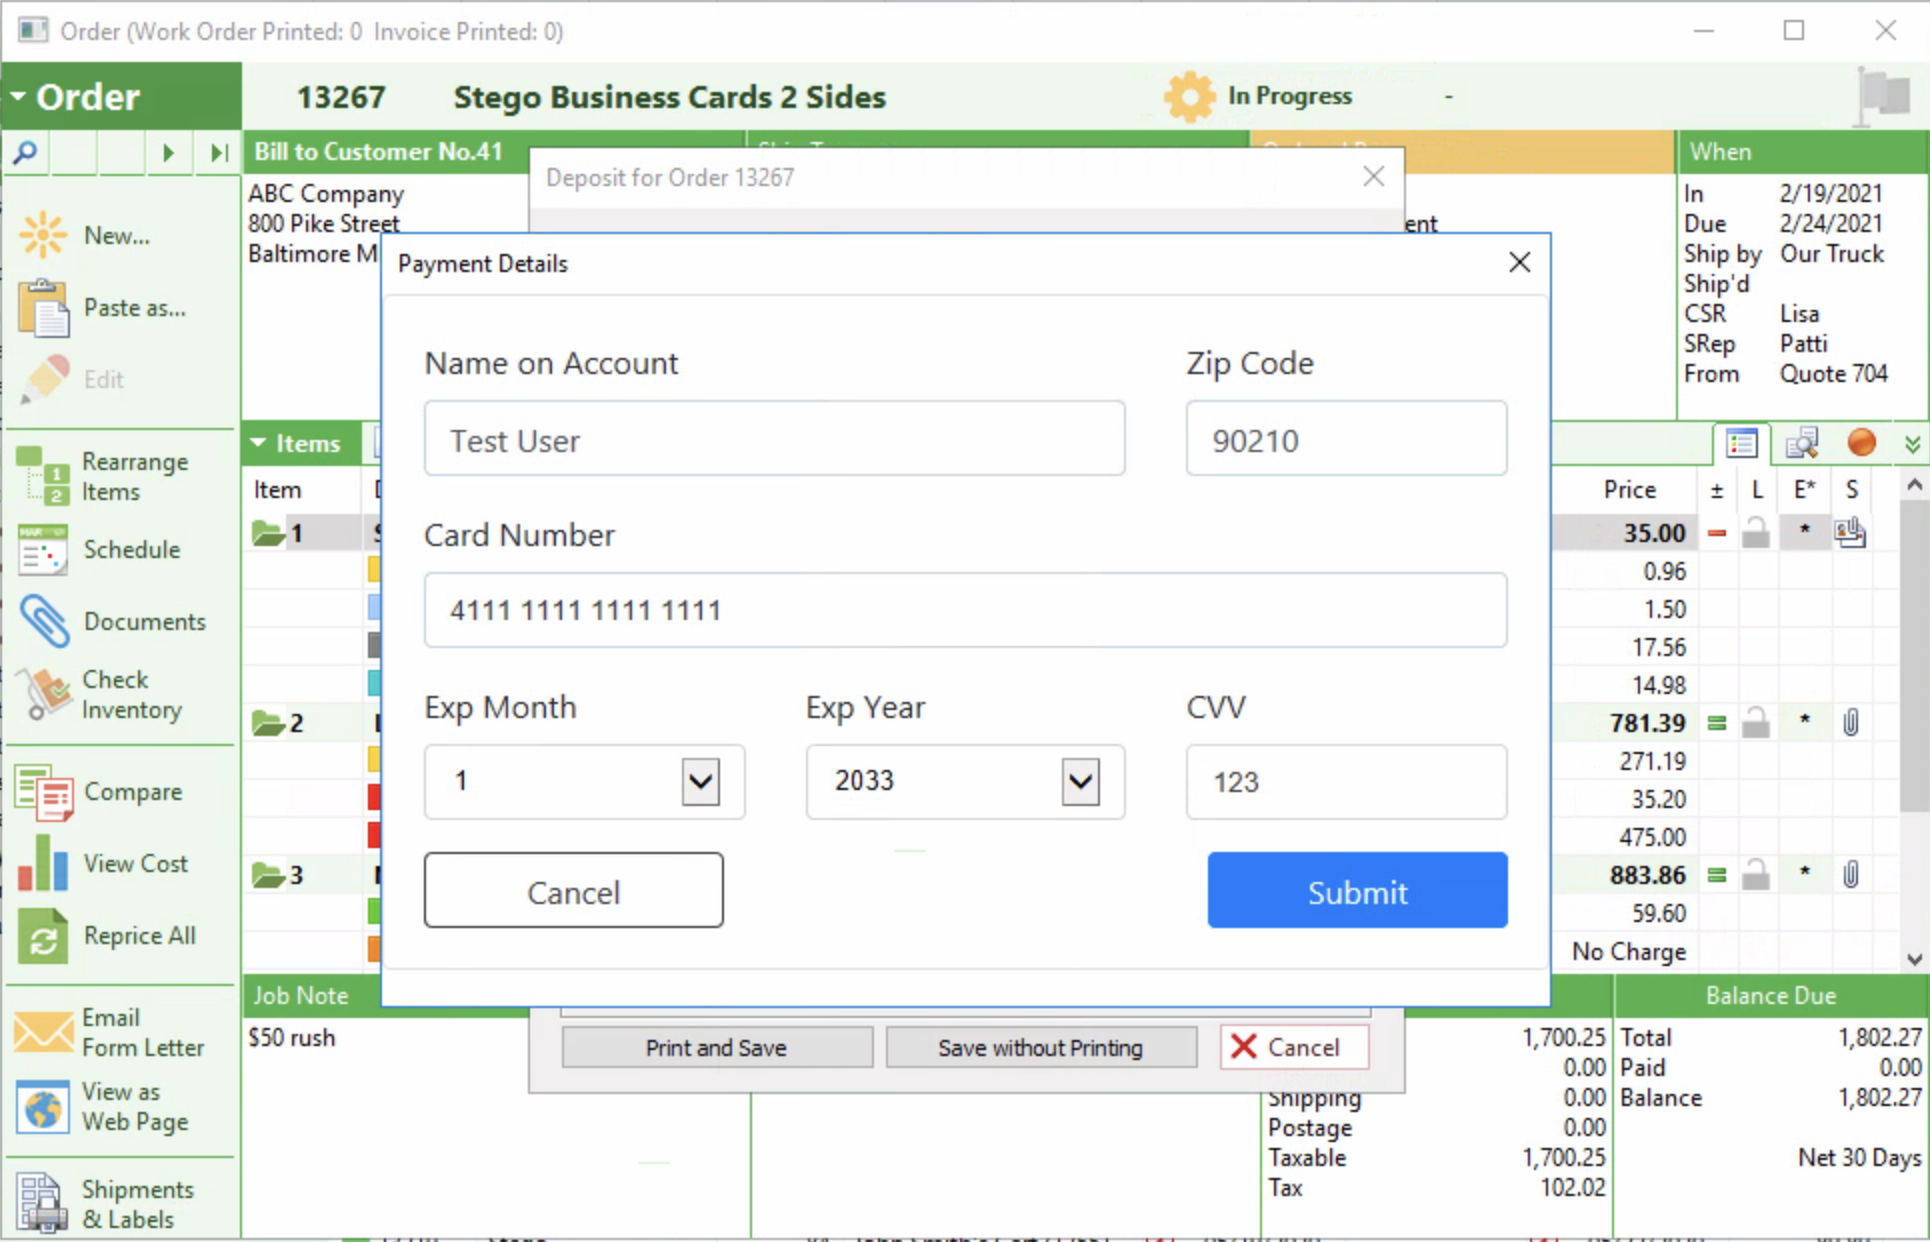
Authorize Manually: Type the card information manually and optionally save the card information to the customer.
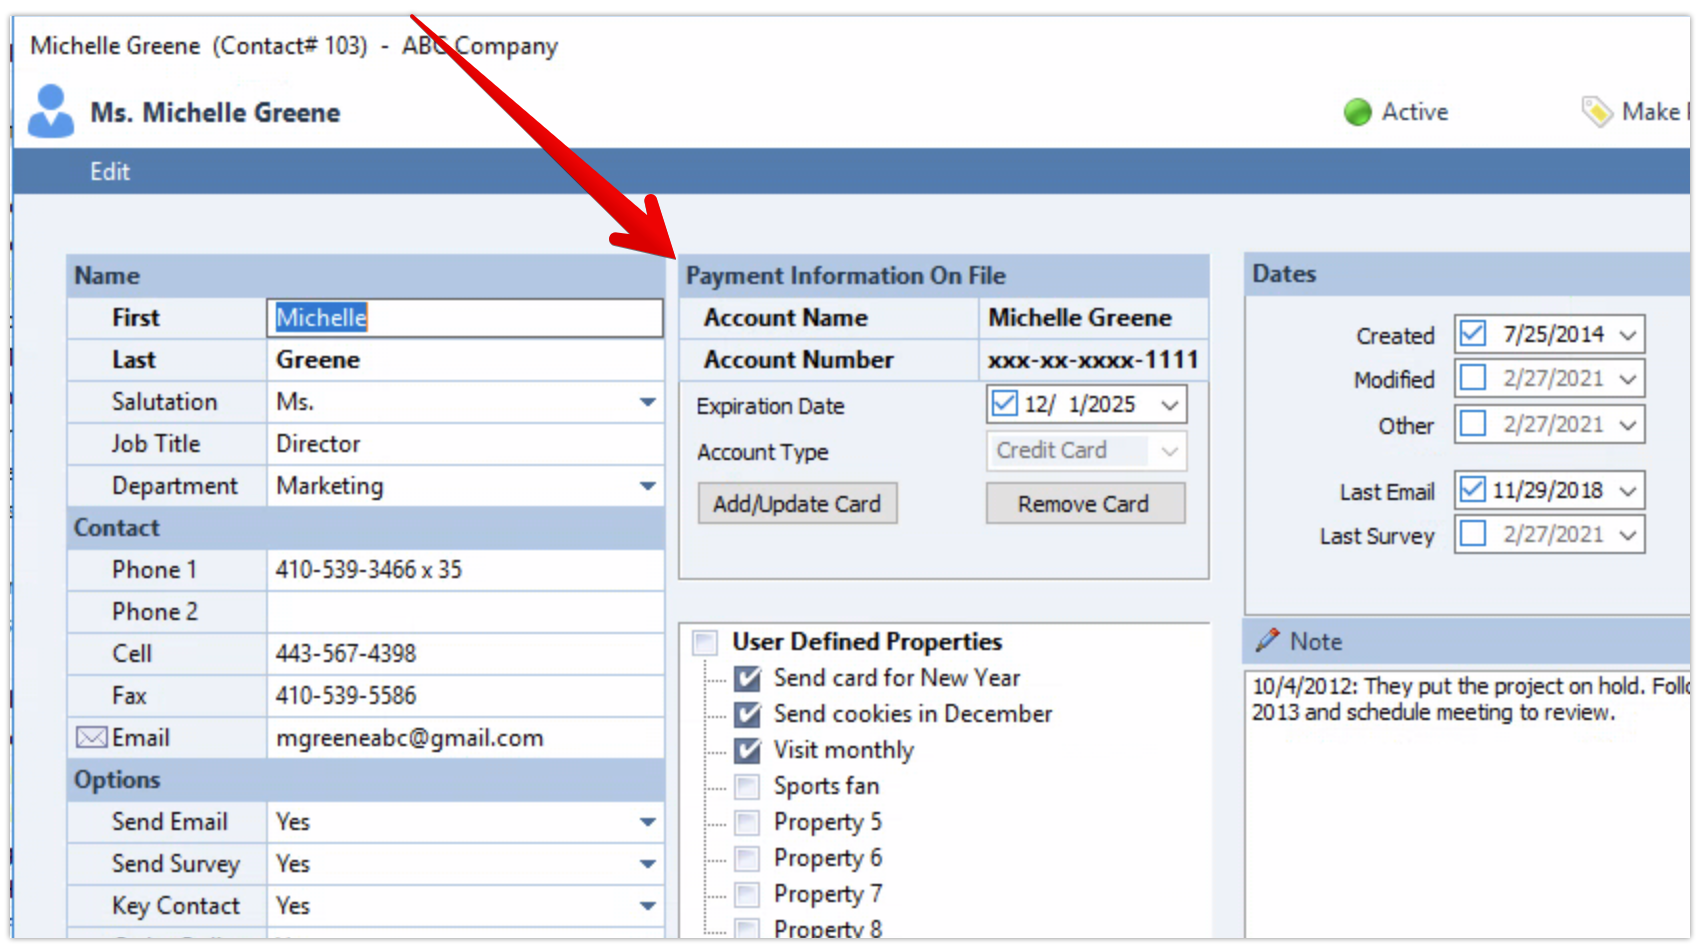
Credit card numbers for your contacts can be edited/removed by opening the contact under the Customer tab.
4. Applying Payments to Multiple Invoices
From the A/R Tab, click Payments Expected in the left-hand column, and open a company with multiple open invoices.
Check the boxes next to the invoices you'd like to apply a payment to, and select Process Credit Card.

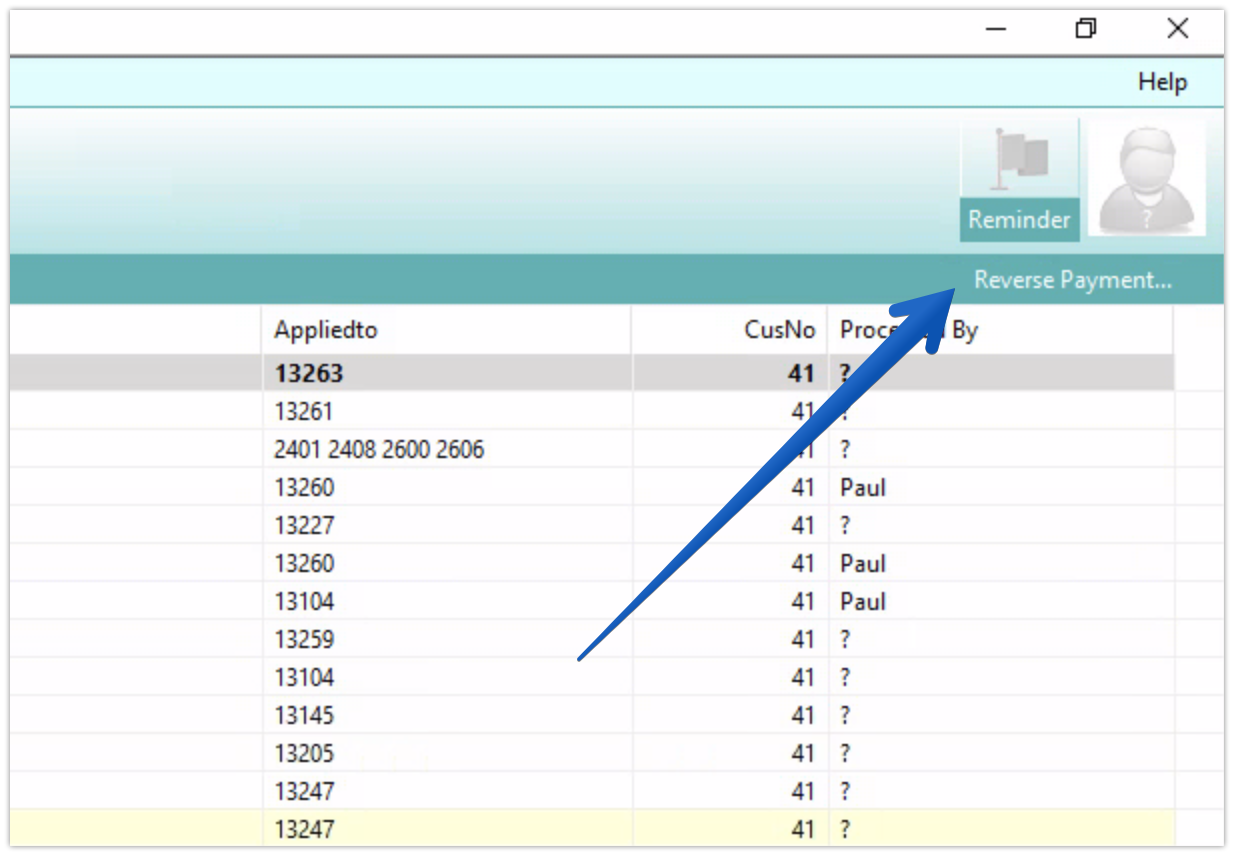
5. How to Reverse a Transaction
From the A/R tab, click Payments Received in the left-hand column. Click to highlight any payment and click Reverse Payment... in the upper right-hand corner. The card will be refunded and the payment reversed.
6. Sending Pay Now Buttons
***For Non-Cloud-Hosted Customers***: If you would like A/R to automatically update when your customer uses the Pay Now button, the Printer's Plan API (Web2Plan) must be installed on the same computer that hosts your Printer's Plan Database. Be certain you have whitelisted all the IP addresses referenced in the API installation guide. Contact support for more details. For Cloud-Hosted users, the API is already installed. The API file PlanWeb.pp needs to be updated by Print Reach.
The built-in email tool has received significant improvements and it's recommended you set it up. Emails sent out of Printer's Plan can automatically appear in your "sent" email folder.
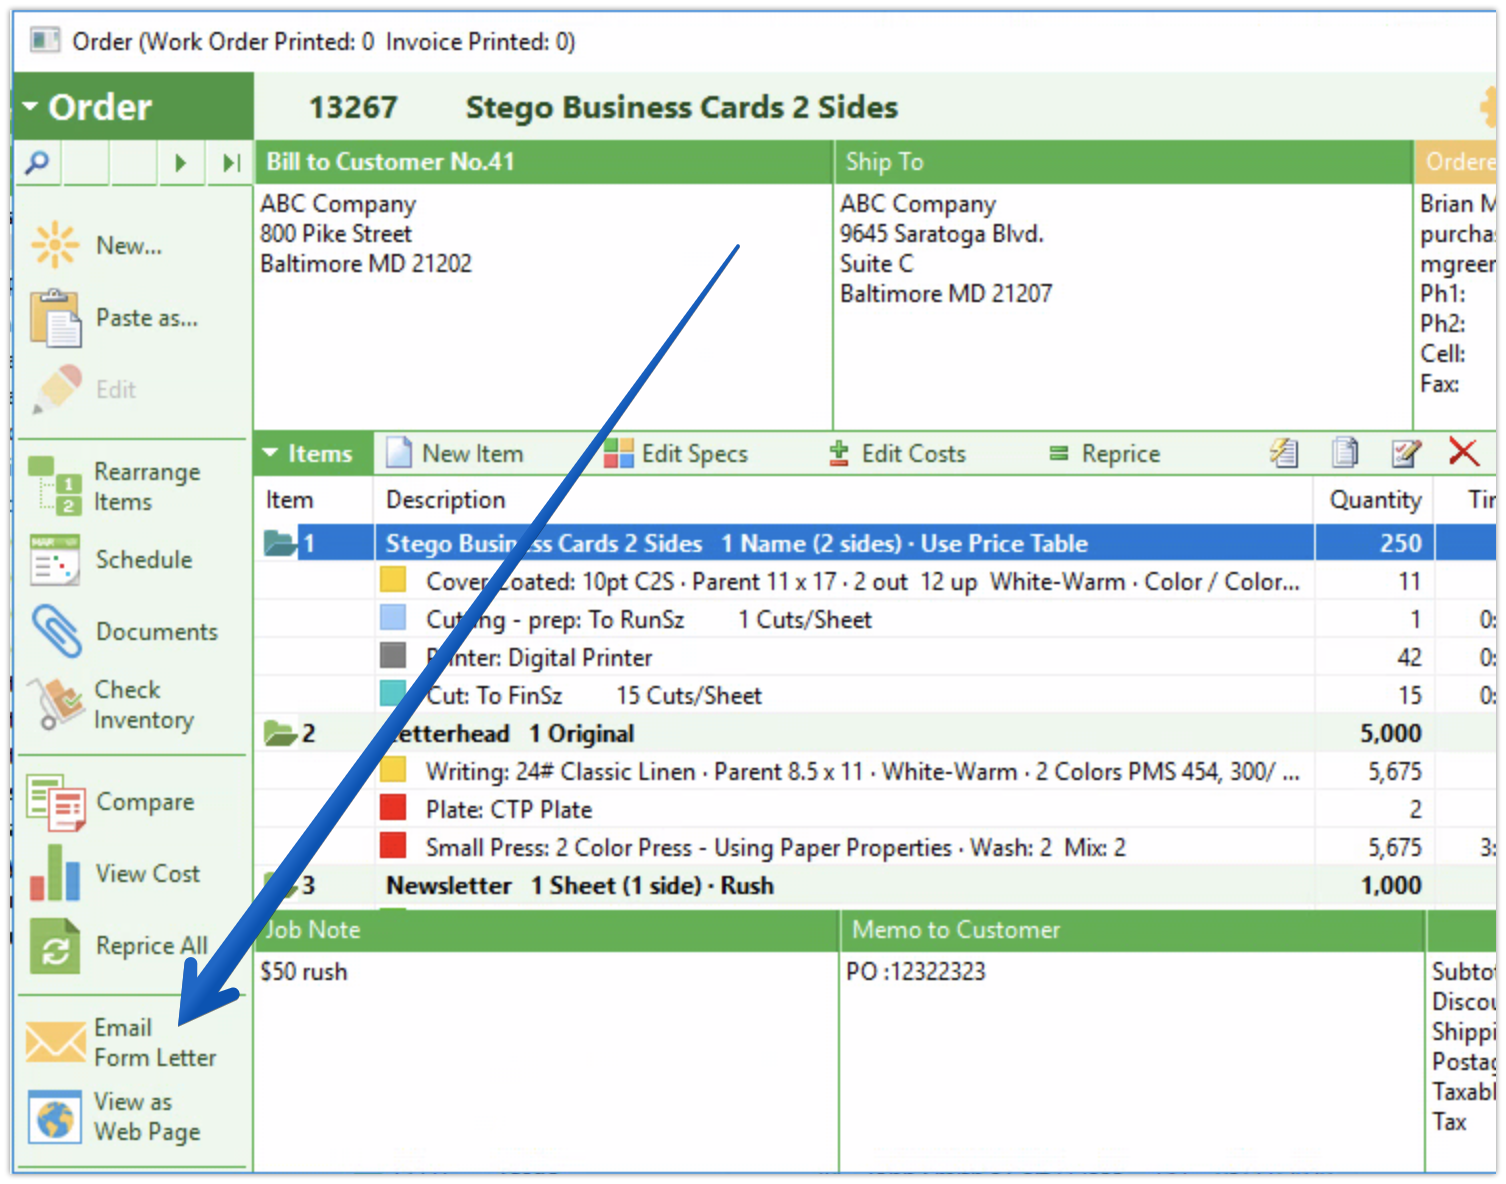
Start by modifying your email templates. Open an Order and click on Email Form Letter.
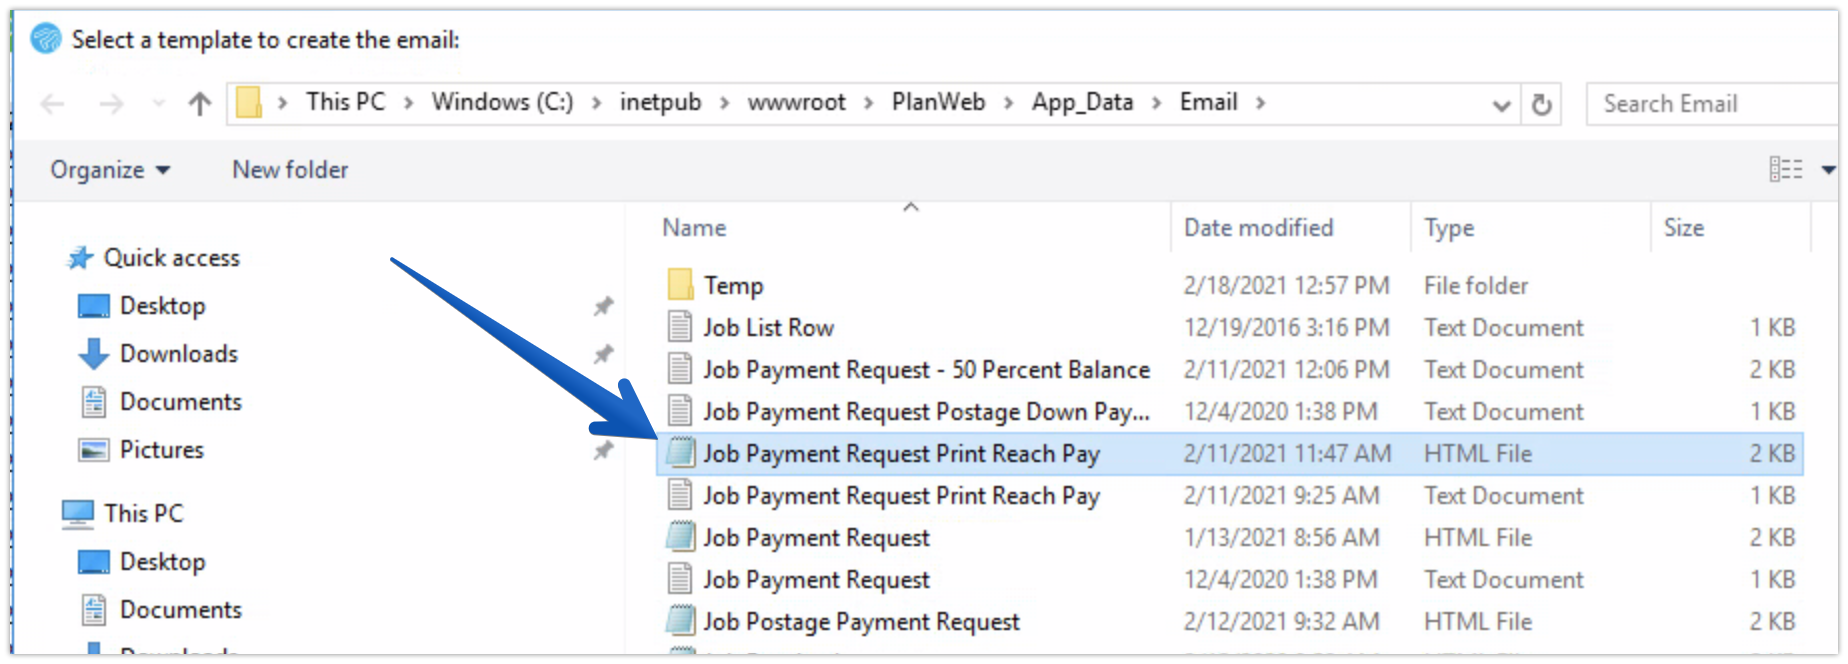
Right-click on the HTML file Job Payment Request Print Reach Pay and open with Note Pad. NOTE: If you're not using the built-in email client in Printer's Plan, use the .txt file.
In the file, find the text which contains your Hosted Payment Page URL (set in Step 2 above) and update the [SiteName] placeholder text in the email template.
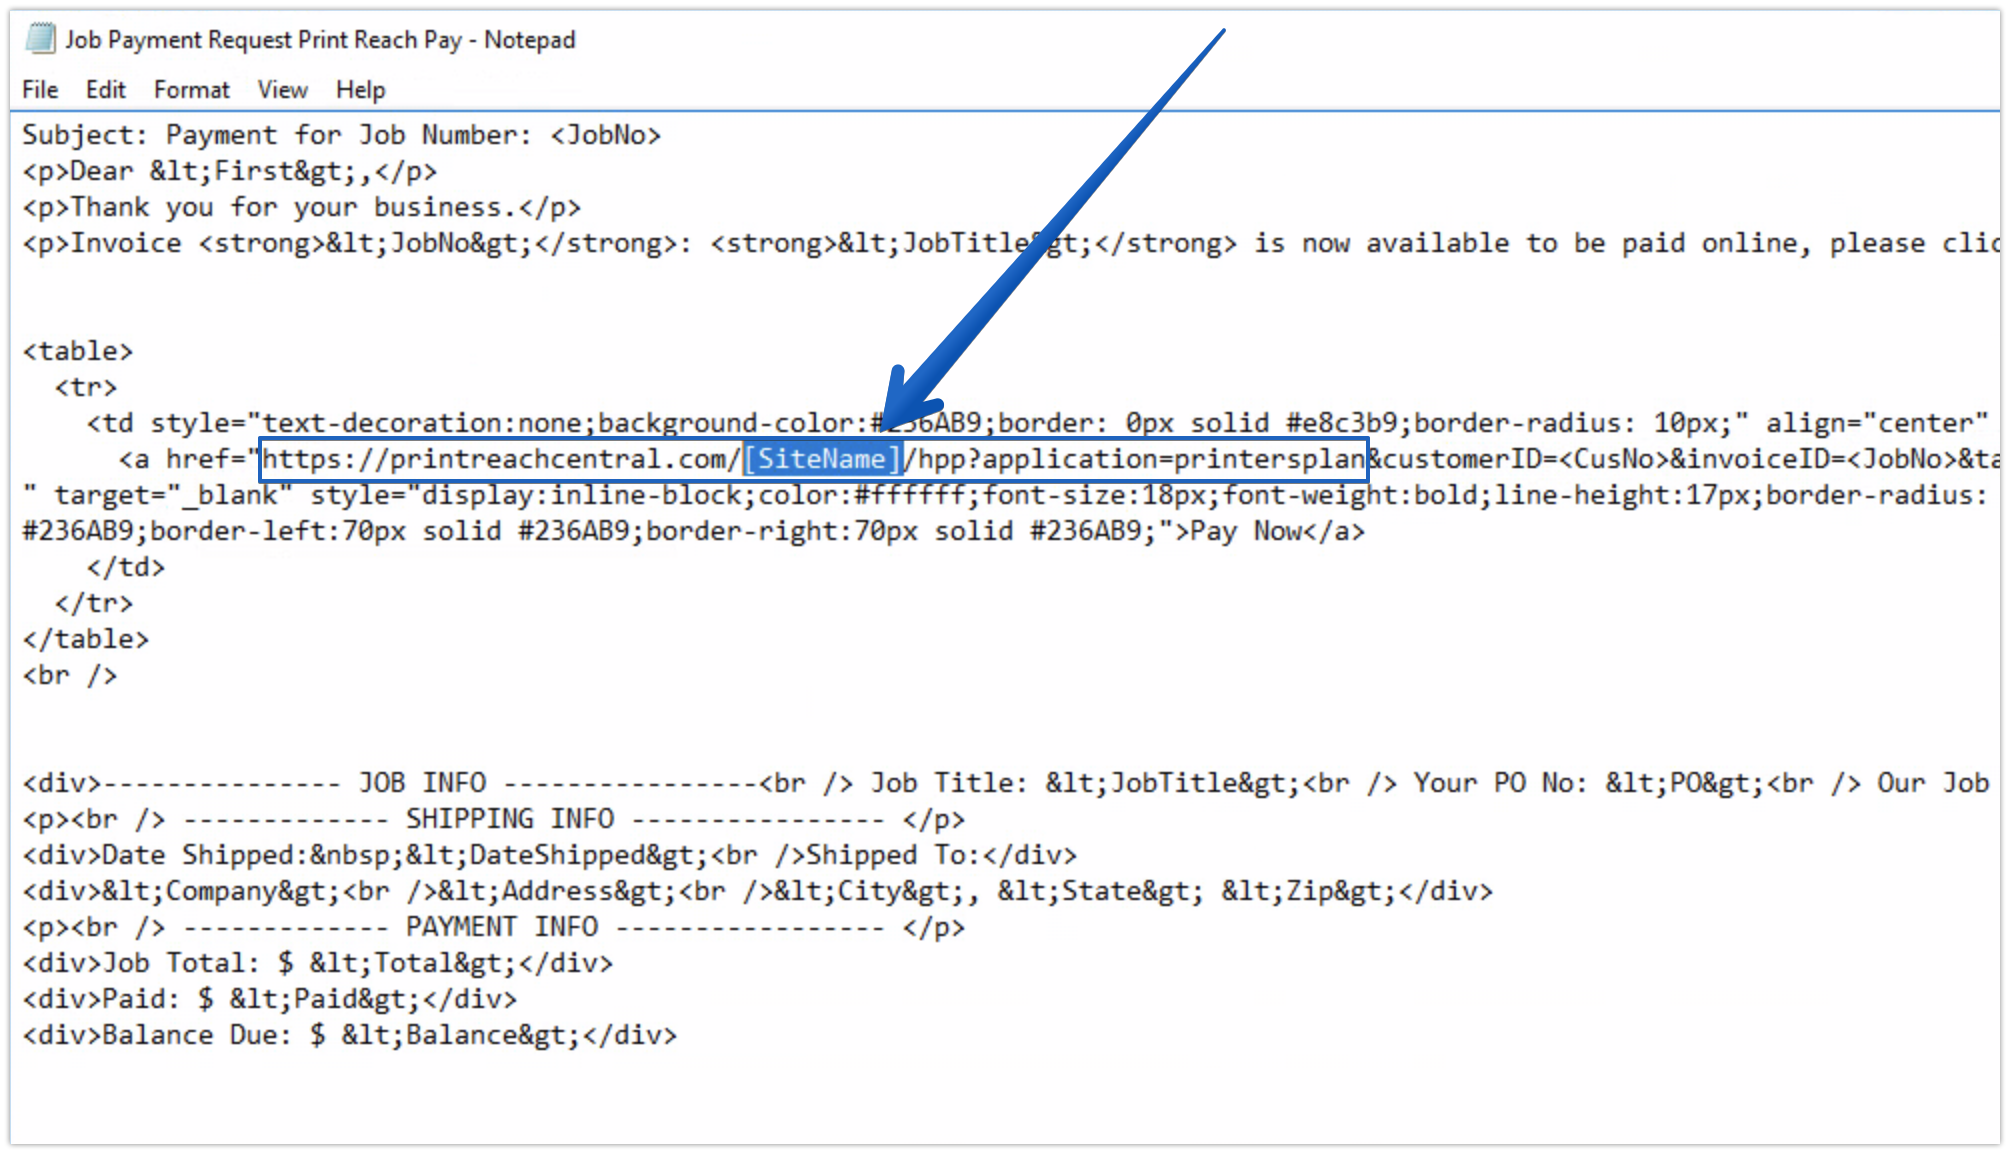
When complete, save the file, and click open use that template:
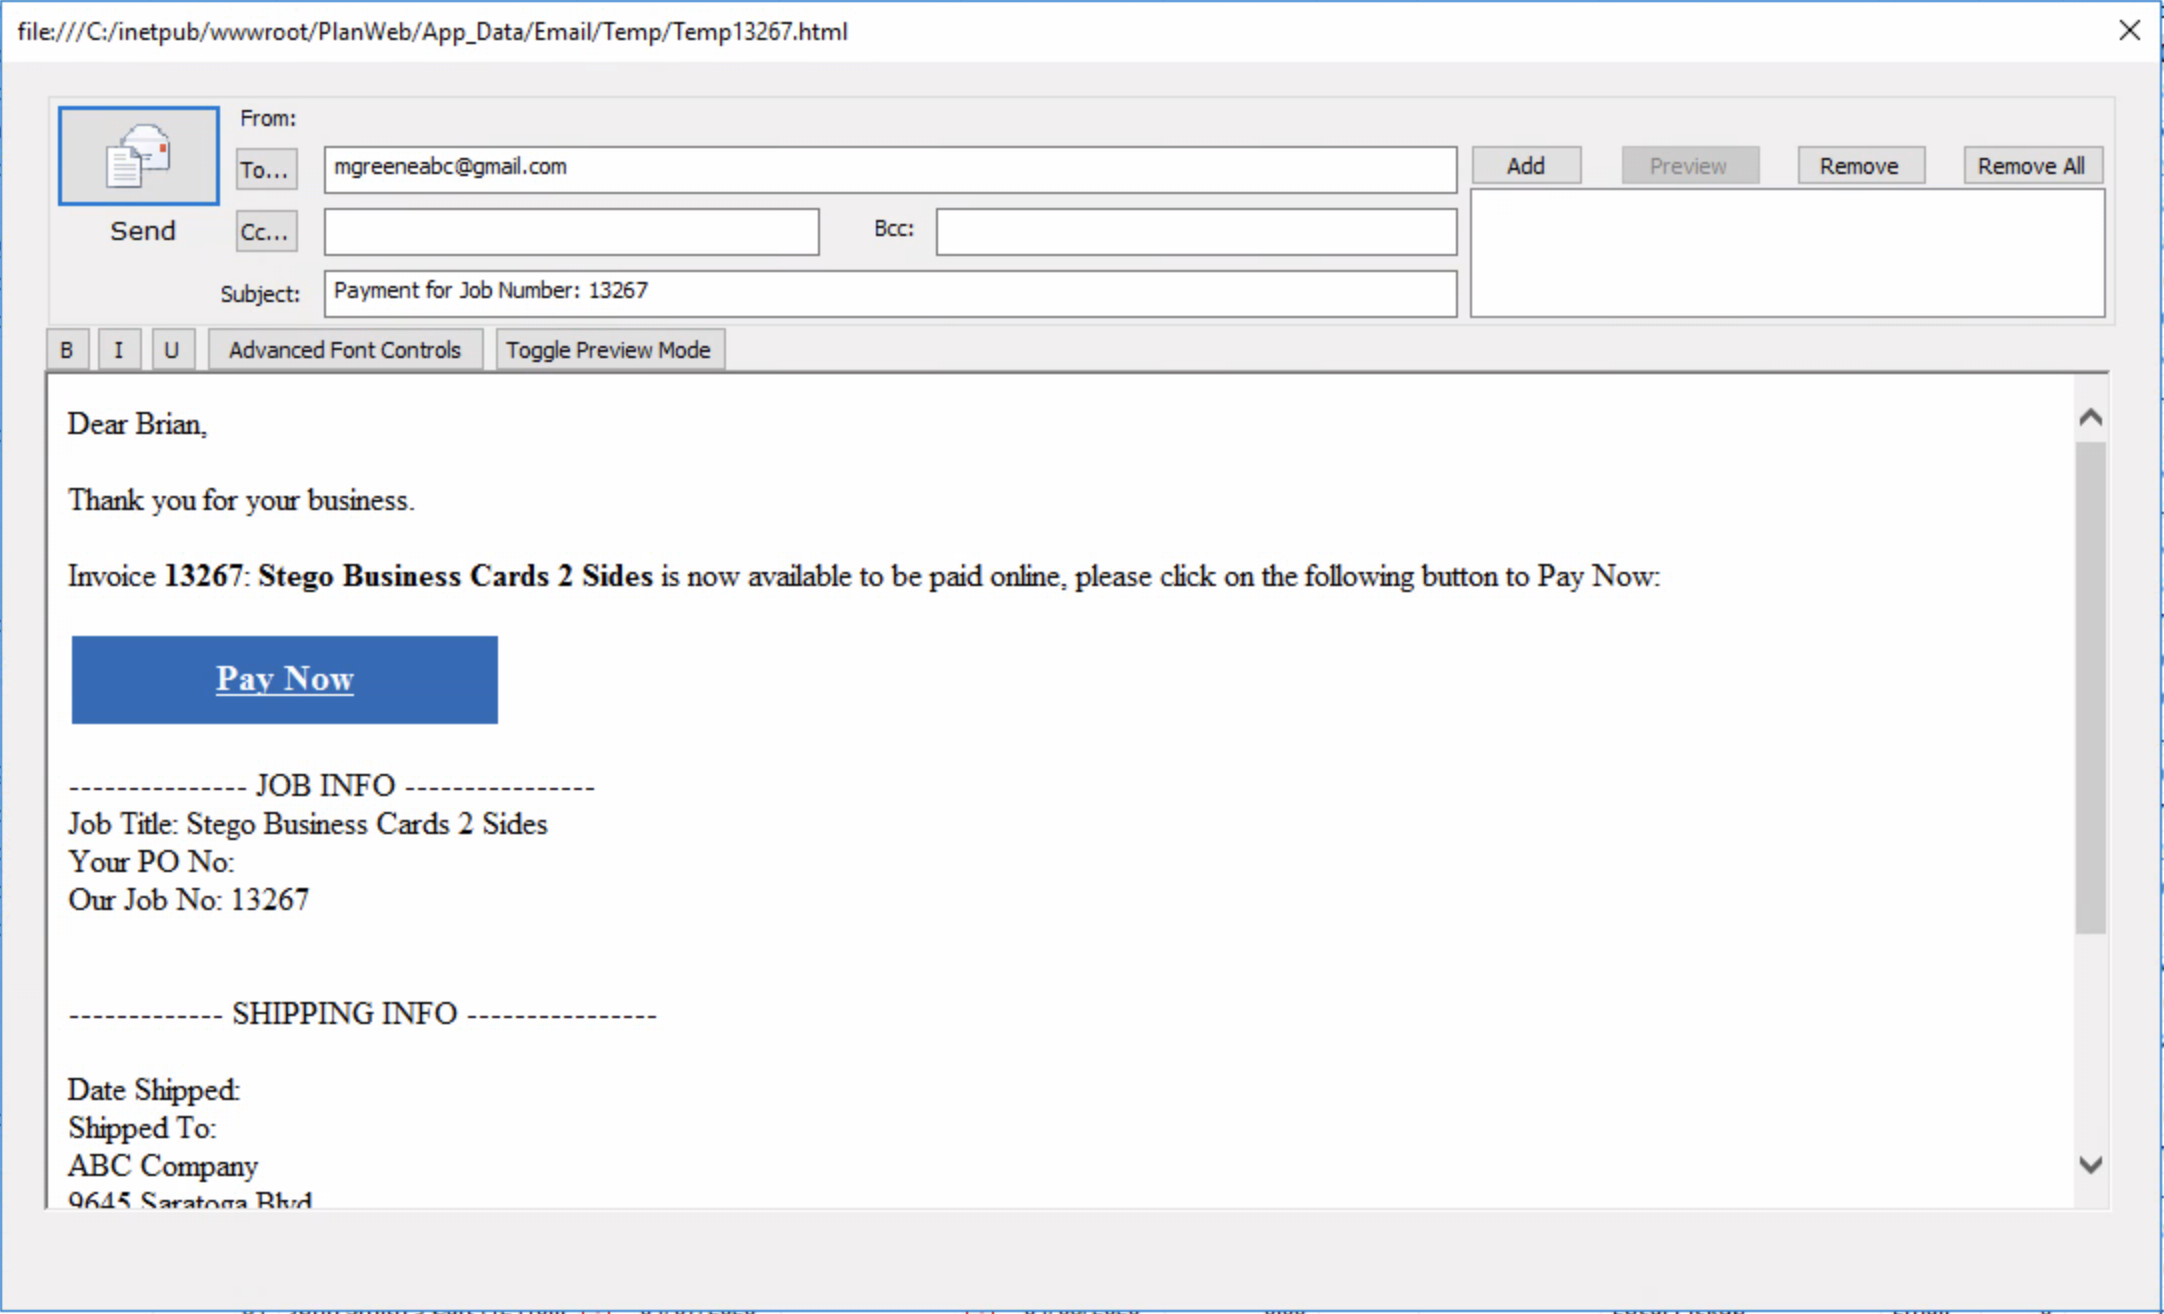
Email yourself a Pay Now button to test the button. Once payment is made, check your A/R tab to confirm the payment was recorded automatically (this assumes you have the Printer's Plan API installed).
7. Reports and Summaries
Most reports can be pulled from inside Printer's Plan > Reports. Additional reports related to credit card and ACH transactions can be pulled from Merchant Track.
To access Merchant Track, log in to your Print Reach Central Account. Print Reach will supply those login credentials.
7A. Launch Merchant track from Print Reach Central.
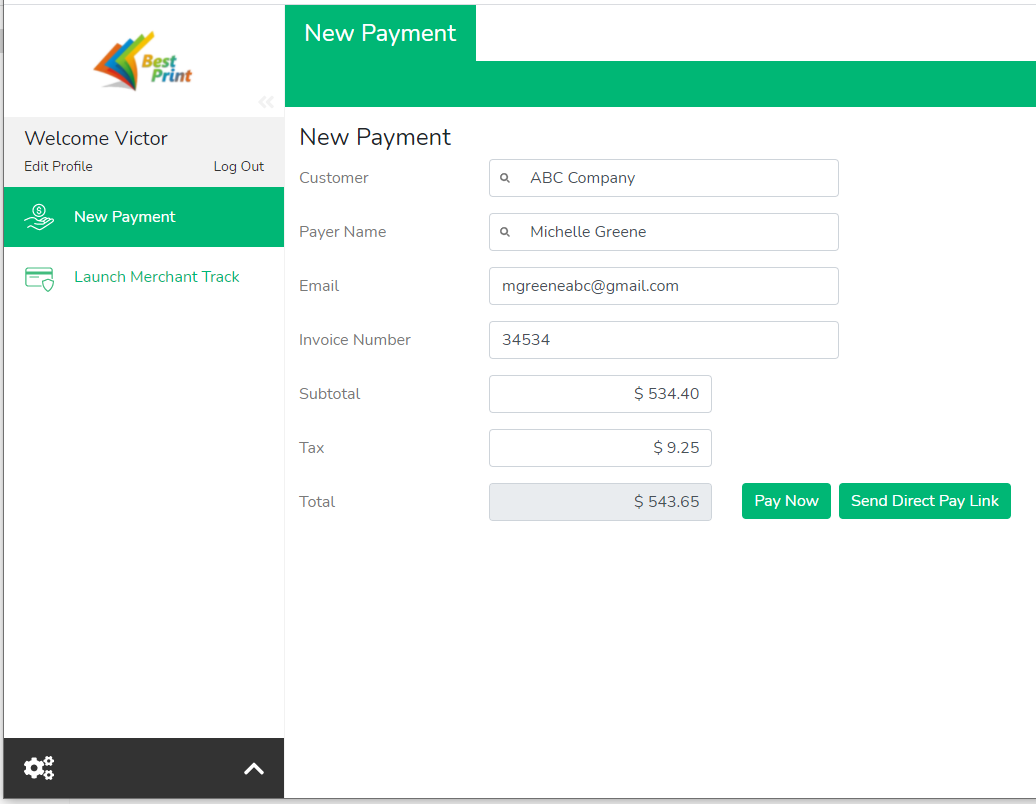
Clicking the Launch Merchant Track option on the left opens the Merchant Track portal.
7B. (Optional) Printer's Plan Merchant track Users
If you are unable to use Print Reach Central you can also create users from within Printer's Plan by following the steps below
Settings Tab > Print Reach Pay > Merchant Track Users
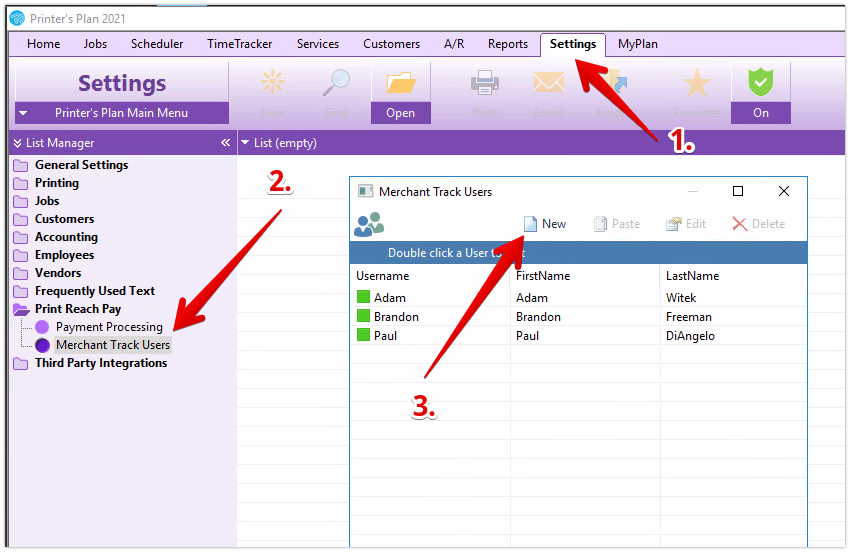
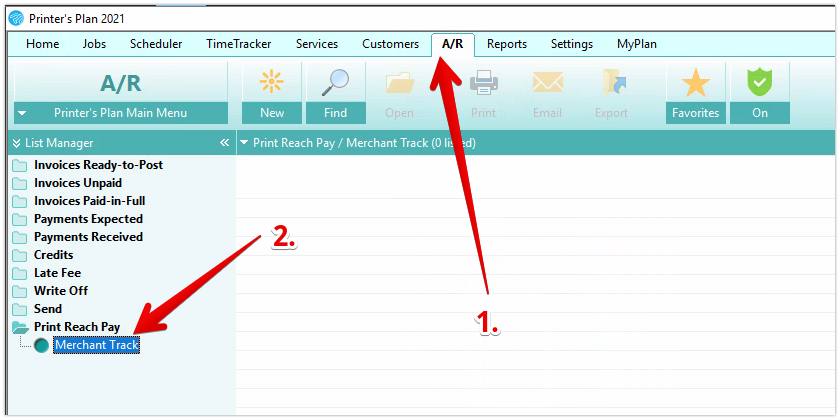
Once a new user has been built, navigate to A/R tab > Print Reach Pay > Merchant Track to open the Merchant Track Website. Can't access the website? Double-check the "Active" box is checked in the Merchant Track User you created.
Additional Resources:
Print Reach Pay - Printer's Plan FAQ