Printers Plan Workstation Setup Follow
In this article, we will go over setting up a new workstation to work with an existing Printers Plan Server.
Libraries
Our first step is to install the redistributable libraries for your version of Printer's Plan.
Click on the link for the proper version to download and then install it.
Getting a copy of Printer's Plan for your workstation
When installing Printers Plan, it is important to know what version you are installing. All versions must be the same as dictated by your license file (PlanWin.PP).
If you are not aware of what version of Printer's Plan you are using, you can check by opening an existing installation of Printer's Plan
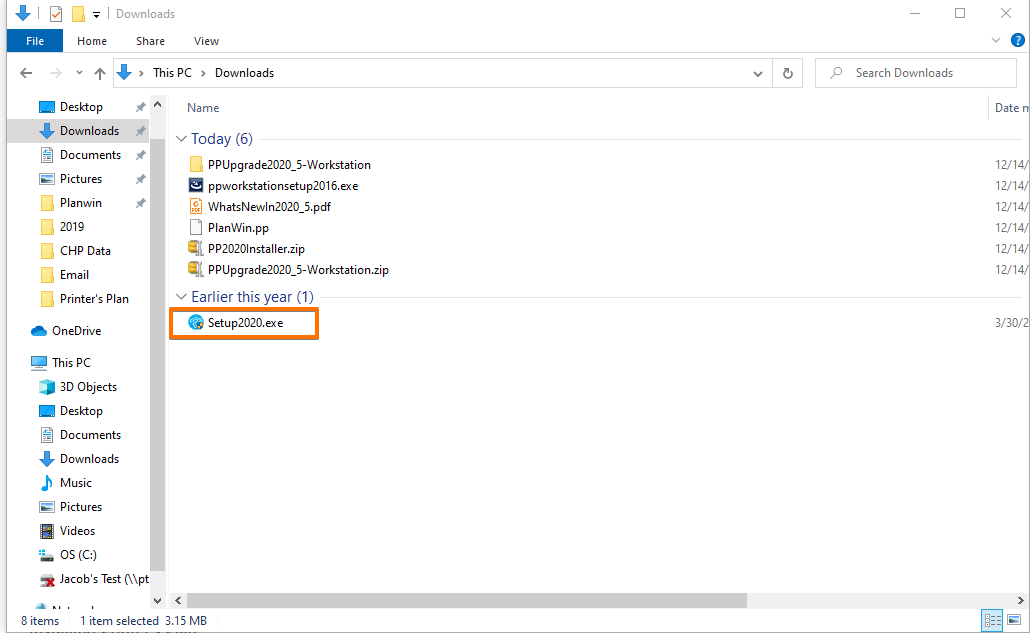
You can download a new workstation installation of Printer's Plan here: Release Notes and Downloads
Installing Printer's Plan
Once you have the file downloaded, you will want to double click it to begin the installation
A popup will appear introducing you to the installer, click next to proceed.

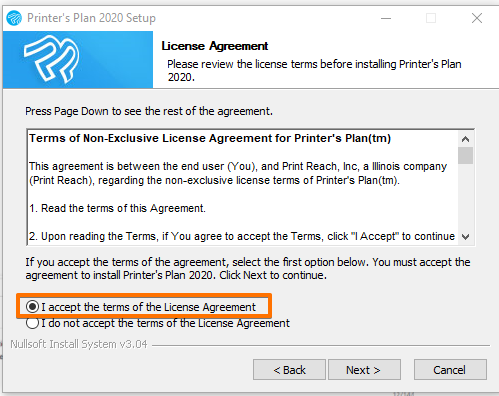
The next screen will show the License Agreement for Printer's Plan, click the button to accept this agreement, and then click Next.
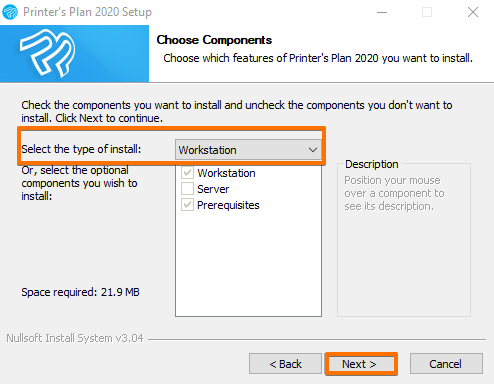
Then select workstation from the list and click next.
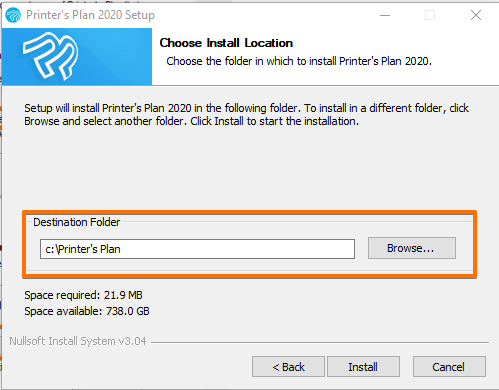
The next step is deciding where you want to install Printer's Plan. By default it will install itself in a folder named Printer's Plan on the C: drive. You can change this if you like. Once you have established the install location, click install to install the program
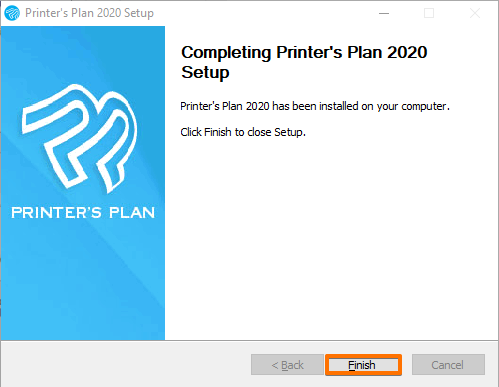
Once this is done, Printers Plan will notify you that the installation is complete, click Finish to complete the installation process.
Connecting to the database
Once you have installed Printers Plan, you will need to connect it to the database.
Open Printer's Plan and you will be prompted to locate the database. 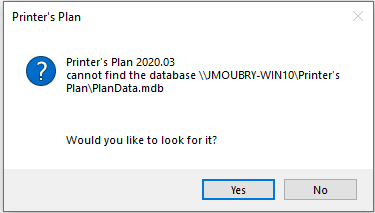
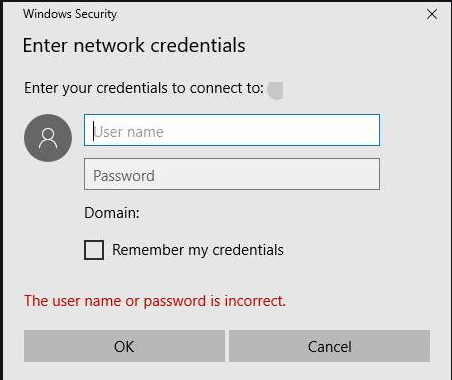
Navigate to the network location of the database. You might see a network authentication prompt. It is asking for a username and password that has permission to the database.
If you are unable to see the server location or do not have credentials you will need to reach out to your IT team to get your PC added to the network share / have a mapped drive setup for your PC.
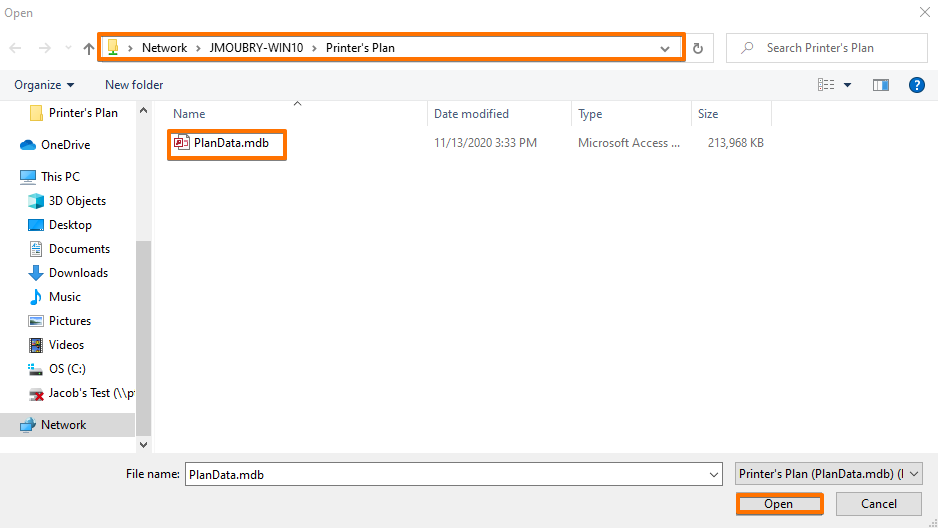
Once this workstation has the proper credentials, you will be able to navigate to the folder with the database. Select the file named PlanData.mdb and Printers Plan will remember that this is the location of the database.
Printer's Plan will automatically open as soon as the database has been selected.
Optional Setup after installing Printer's Plan
Optimizing Performance of the database engine
To get a faster response for the history you may want to make the following change to the registry on the computer.
In the Windows Search field, type regedit, and then press ENTER. This will open the registry editor window. In this window, browse to the following registry entry:
o HKEY_LOCAL_MACHINE\SOFTWARE\Wow6432Node\Microsoft\Jet\4.0\Engines\Jet 4.0
· Change the MaxBufferSize from 0 to 50000 (Decimal).
Sending Email from Printer's Plan
If the ability to email out of Printer's Plan is required please follow these instructions in order to send emails using Printer's Plan: Using and setting up SMTP emails in Printer's Plan